Spicy Zucchini Green Curry Bisque

Not sure what happened, but about a month ago, I had a huge craving for thai soup. Hot, spicy, thai soup. In the middle of 85 plus degree august. I thought I was going nuts, but there I am, in the heat of summer, looking for more heat. 

I went with it. What else can you do? When you crave something, you just crave it.

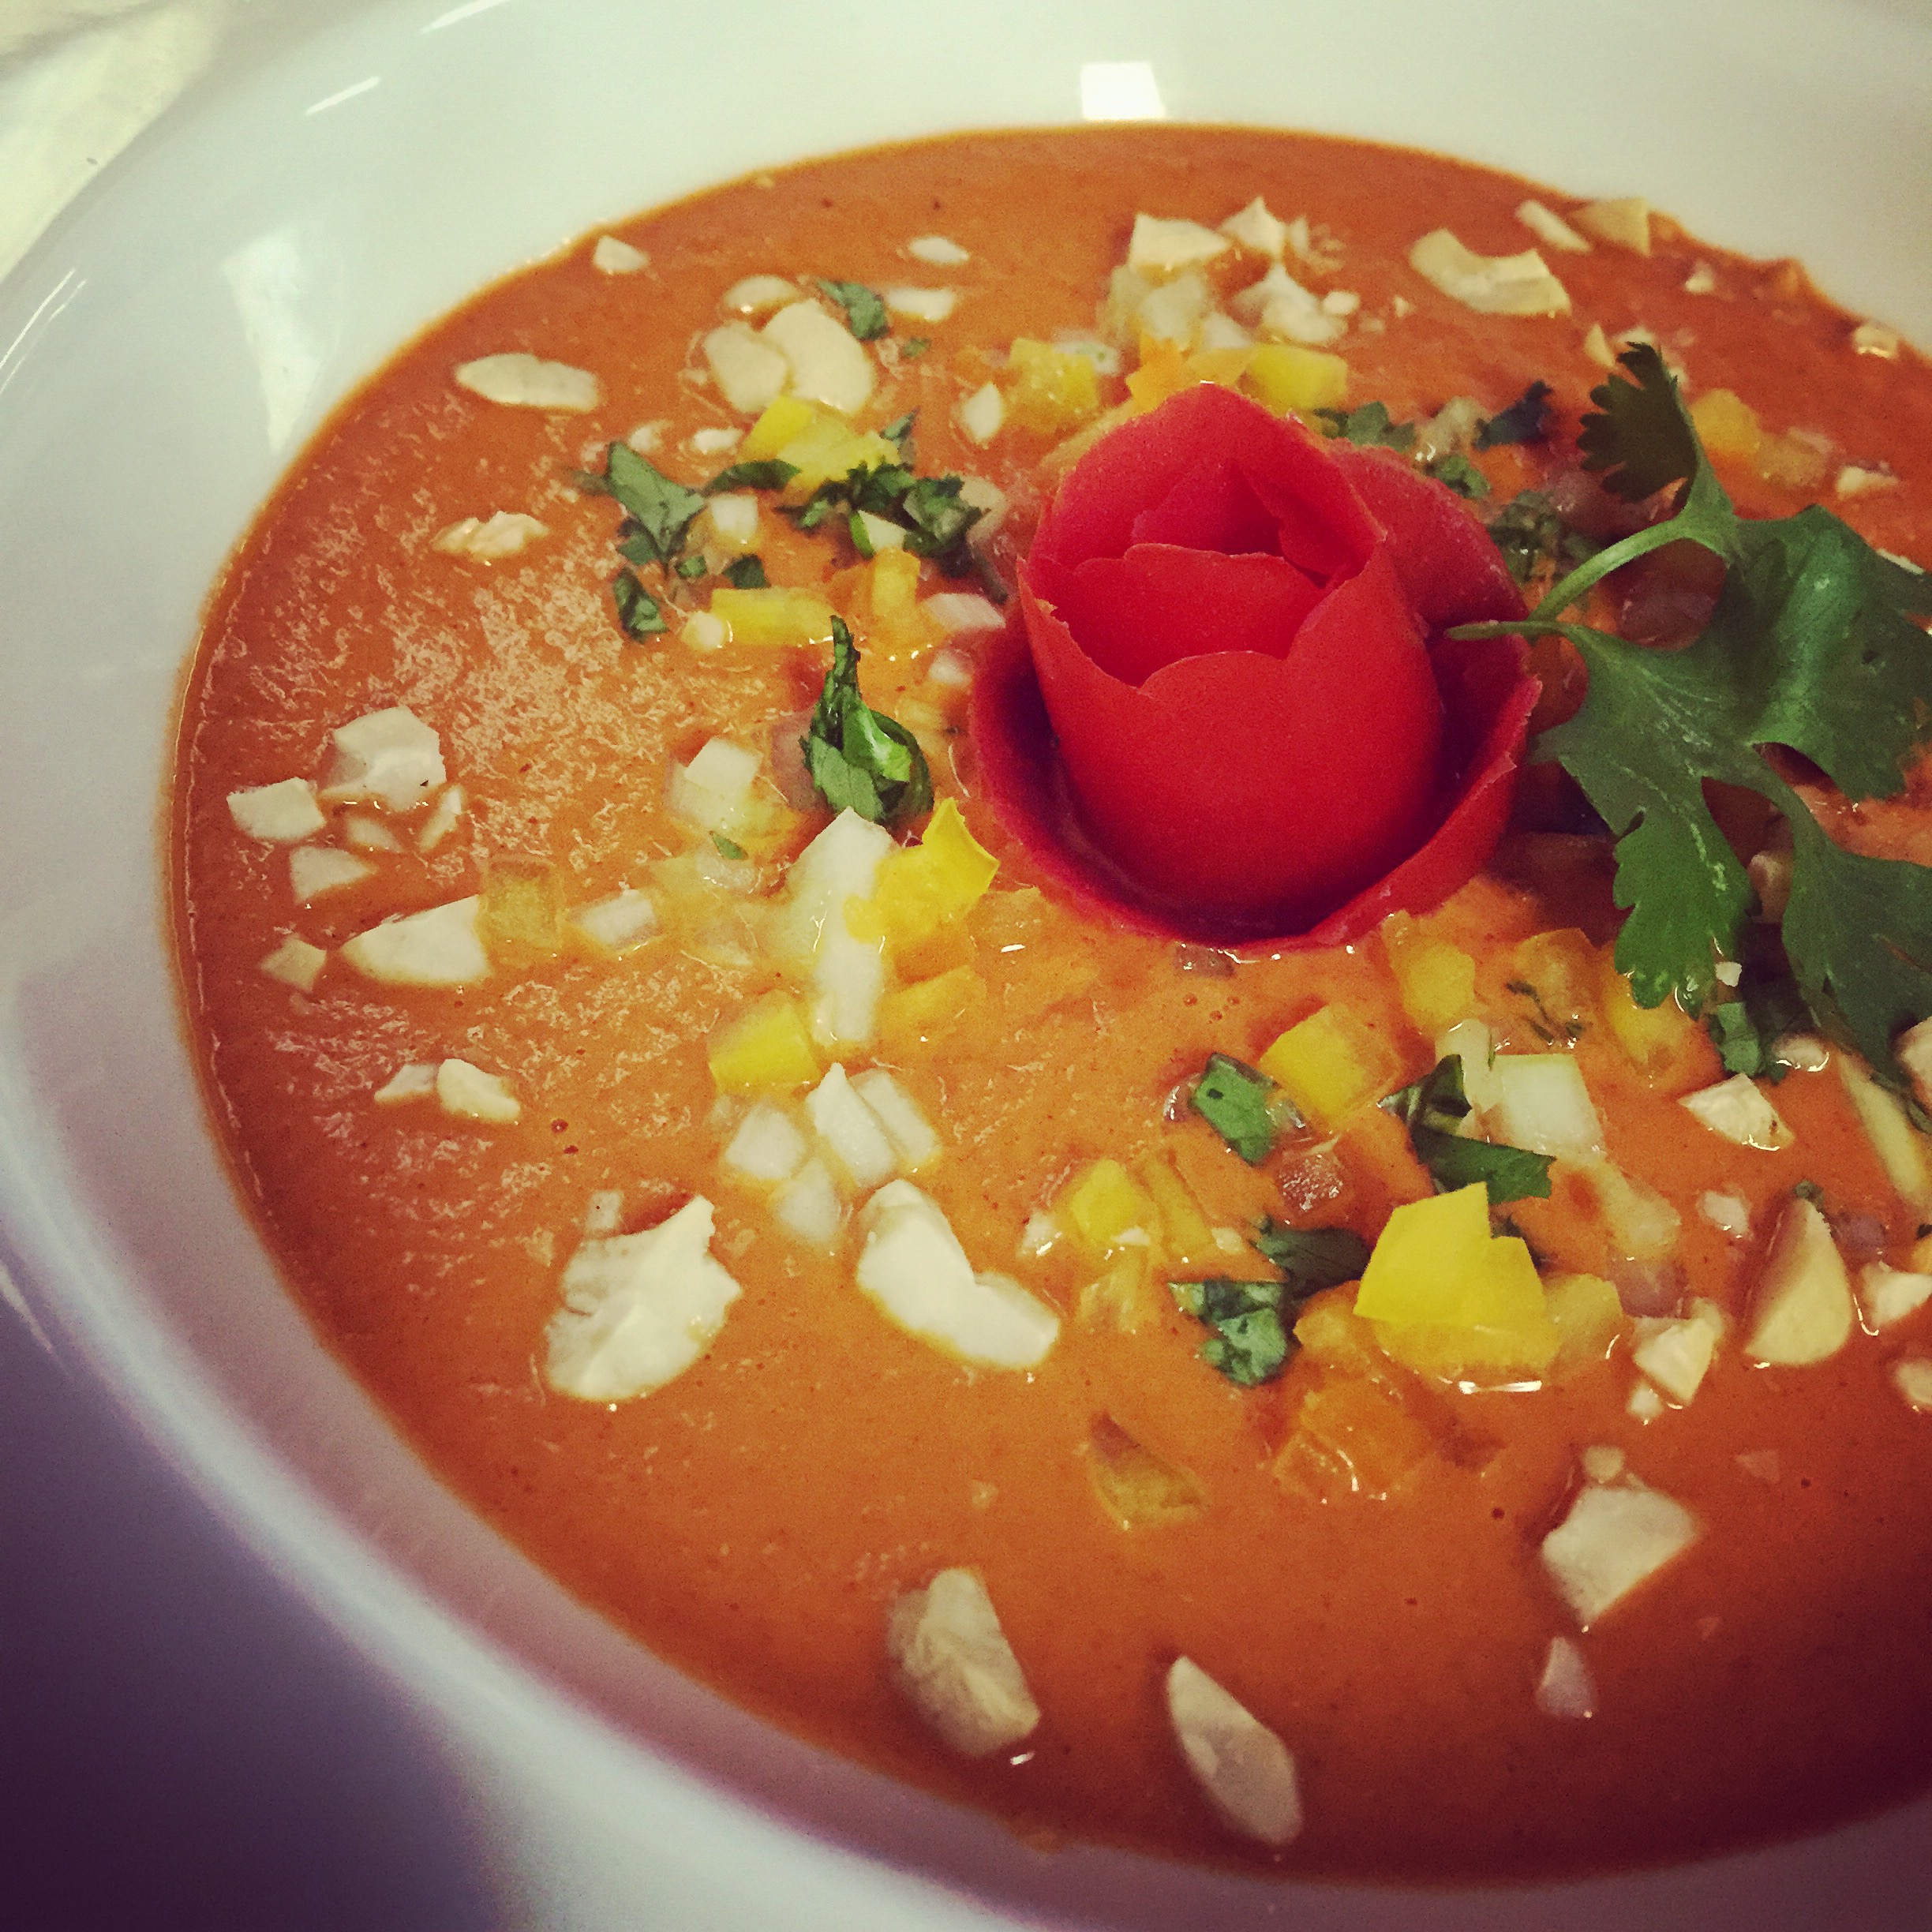
At the same time, our garden was producing zucchinis by the boat-load, so I made good use of them. Chopped them up, threw in a forgotten sweet potato (lonely little guy), some coconut milk, green thai curry, sea salt and pepper, blended it up and it was fantastic! Easy peasy, too. Whatever I needed in the spice, it delivered it beautifully and I was happy. 

If you're a normal person, feel free to make this sometime in the fall when it's a little cooler out. You can also serve it chilled as a nice summer treat. Or if you're a little nutty like me, go for it hot. 

1 yellow onion, chopped

1 sweet potato, peeled (optional) and chopped

2 medium or large zucchinis, chopped (if you a large amount, just add more water and taste for curry paste)

1 can light coconut milk

2 tablespoons green curry paste (I use this one

water

Combine onion, sweet potato, zucchini, coconut milk and just enough water to cover in a heavy bottomed pot. Bring to a boil, cover and simmer until fully cooked, about 25 minutes or so. Add in the green curry paste, blend using an immersion blender, and taste for seasoning. Enjoy! 


Natural Eating

design-3 copy.png

A very simple rule of thumb is to ask "does my body recognize this food".  Does it grow on a tree, in the ground or on a bush, or is it prepackaged by somebody's hands and includes stabilizers and preservatives?   Eating "close to the source" means eating food that is close to the way nature designs it.  Incorporating this way of eating into your daily lifestyle will almost instantly take care of most health problems in our society today.  This especially is true for you, if you suffer from acne, headaches, lack of energy, mood swings, digestive issues, lack of regularity, and even depression.  You are not alone, and you can alleviate your symptoms quicker through this way of simple but nutritive eating, rather than through pills, creams, boxed foods and processed “food-products”.  You can achieve greatness and begin your new way of life by healing yourself from the inside out.  It cannot be more intuitive and simple.    

I hope you can take today to mark day one in a lifetime journey or true nourishment.  Eat close to the earth, things you can pronounce, things you recognize as growing on a tree or in the ground. Wash it, and take a bite.  That nourishment is exactly what your body is searching for. 

Two Harvest Tomato Recipes

It’s late August here, almost September, and we’re swimming in tomatoes (which is a lovely byproduct of treating your garden well). There’s nothing like planting your seed, tending to it, growing seedlings, moving them outside to acclimate, then planting, then nursing, watering, mulching, pinching, helping pollinate, and then finally harvesting. The summer garden is glorious, rewarding work, but the best part is making the recipes after harvesting super easy. I avoid elaborate recipes and just go for simple and delicious.

The first recipe is a “baked” tomato sauce ~ you can use whole tomatoes, cherry, plum, heirloom, whatever you have on hand. You can find the full recipe here, but I basically just roast tomatoes with herbs and garlic, then pulse in a food processor (or not, you can leave them as is and just mush with the back of a spoon if you like a heartier sauce), and serve over zucchini noodles, over some orzo, or anything else you think of.

IMG_8398.JPG

The second recipe is one of my favorite ways to eat tomatoes, by far.

Roasted Pepper & Tomato Salad

1/2 jar of roasted peppers, sliced thin (or you can roast your own peppers!)

1/4 red onion, sliced

about 1.5 cups sliced tomatoes

drizzle of olive oil

drizzle of apple cider vinegar (or balsamic)

pinch salt

Combine ingredients together and serve as a side with any of your summer bounty plates. Delicious with roasted eggplant and zucchini, along side some crispy baked chickpeas, or even with some just-harvested roasted purple potatoes….you get the idea.

IMG_8499.JPG

A quick September recipe (when you still have tomatoes, but the weather is cooling a bit) would include incorporating some polenta, a favorite food from my childhood. You’ll want to use really fine cornmeal here: the ratio is 1 cup cornmeal to 3 cups water. Bring to a boil, turn down to a simmer, add a little salt, and stir, stir, stir. It will spout and spit so maybe wear a cooking glove (I’ve been burned by polenta before!). The polenta should be done when it pulls away from the sides of the pot. For me, all it needs is salt to taste amazing, but you can also serve it with some vegan butter and/or cheese. And a generous helping of the tomato and roasted pepper salad, of course. Add in your favorite protein, and you’re all set!

IMG_8498.JPG

That’s it - enjoy your garden bounty, or head to your local farmers market to reap the rewards of summer tomatoes. They will not disappoint!

Simple Mexican Zoodle Bowl

Spiralized zucchini are one of the easiest summer foods (especially when you have them growing in your garden). It’s also found early fall (like now in late August, early Sept) at farmers markets, when their last zucchini plants are still giving forth little but SUPER tender zucchinis. Grab them while they’re still there! I just bought one yesterday and it tasted like heaven!

One of the things that I have to watch out for (and probably many of us) is how glycemic foods can be, especially pasta, breads, baked goods. Zucchini noodles low glycemic, raw, huge in fiber, and taste “al dente”, almost like the real thing. Of course, you can spruce them up with red sauce or pesto, but my favorite is chipotle garlic salsa. There’s really no recipe: you just chop and mix and you're done. It’s basically tomatoes, garlic, onion, chipotle powder, lime, salt, and a little cilantro. Done. It makes my tastebuds sing!

I use the following spiralizer for zucchini when I'm just making this dish for myself or for two: it really just makes angel hair, which is great for me. But when I want to get really fancy, and require additional thicknesses, like udon or spaghetti, this is the gadget you’re looking for. I really just pull this one out when we have company over.

So, let’s get ready to eat!

Ingredients:

1 medium spiralized zucchini (keep the peel on - it's prettier that way)

about 1/2 cup any salsa (fresh is best, but store bought is fine in a pinch).

That’s it. Yes, I’m the queen of 2 ingredient recipes. That’s just how I roll. Get yourself a nice bowl, place your “zoodles” at the bottom and pour the salsa on top. Yum!

Feel free to make a taco bowl out of it: black beans, avocado, cilantro, add in some pumpkin seeds, coconut bacon, it’s all delicious. Even throw in some whole grains like sorghum, brown rice….go crazy! One some really hot late summer days, though, I really just love it simple with zucchini and salsa. It’s not fussy and it really hits the spot.

Crazy Good Sauerkraut

IMG_8091.JPG

I’ve made sauerkraut so many different ways - using a brine, just massaging it with salt, adding salt water, which are all similar, traditional methods for making raw probiotic-rich fermented cabbage. However, most recently I’ve found a favorite recipe that’s my preferred way of making kraut, mostly because the flavor is simply amazing. It has just the right amount of tang, it’s not overpowering, and sour just enough. I’ve been using the Caldwell Starter method, and haven’t looked back!

Caldwell Starter is a product you can purchase, which contains a blend of living active bacterial. Refrigeration is recommended, so be sure to refrigerate it as soon as you receive it. Instructions are found in the packet, but here’s a summary:

  1. Slice the cabbage thinly, about 4 pounds (white or purple, doesn’t matter ~ or try a mixture!)

  2. Dissolve 3 tablespoons salt in 2 cups of water and stir well

  3. Dissolve the contents of one pouch (starter comes with 6 pouches) in a cup of room temperature water and let the solution sit 8-10 minutes.

  4. Combine salt solutions, starter and cabbage and massage for 10 minutes. At this point, you can also add a tablespoon of juniper berries or 2 tablespoons or so of caraway seeds (my favorite). Once massaged, add the mixture to a large mason jar, make sure the cabbage is covered int he brine, place a lid on top (but don’t secure well), and let sit on the counter 7-10 days until the perfect tang.

  5. Refrigerate at this point and enjoy!

That’s it - the hardest part is massaging the kraut, since it’s definitely an aerobic activity! But nothing comes close to the joy you feel when you made your own supply of sauerkraut that will last for months to come. Enjoy!


Top Tips For BLE

design-3.png

I’ve been doing Bright Line Eating (BLE) since January 21st of 2019. In 7 months, I was able to release 50 pounds, and I’m now in maintenance. I’d like to share some lessons I learned along the way, in case it can help someone through this journey. Here they are!

  1. Write your food down the night before (even though you think you don’t have to). I didn’t do this at first and my lines were bright, but when I hit a plateau or broke my lines, writing my food brought me back on track.

  2. Weight loss is not a straight line down, but quite all over the place! Be ok with that. Don’t let the scale dictate your emotions or your next behavior. Just stick to the plan!

  3. We’re all conditioned to emotionally eat (think pacifier, bottle to soothe, etc) ~ learn new tricks and new ways to cope with: boredom, stress, sadness, etc. This is the hard part, as we’re re-wiring the way we cope and work with food. It takes time, be patient. 

  4. Drinking water or tea really helps with hunger, to get you to the next meal. I drink a full glass of water when I feel a bit hungry, but it’s not dinner time yet. 

  5. On the subject of hunger: it’s going to be ok. I had to remind myself that since I ate about 2 or 3 hours ago, I won’t die if I just wait another 2 hours. I can make it! And reminder to self: hunger is not an emergency. Drink your water, and you’ll be ok. 

  6. If you’ve a “volume eater” like me (meaning, I like more food that’s light vs. less food that’s heavy): include greens with most meals. Arugula is a favorite, romaine, butter lettuce, etc. You fill up on the good fiber and greens and that helps you get to the next meal without being as hungry. What’s helped me is also choosing lentils (6 oz) over cheese (2 oz), avocado (2 oz) over oil (1 tb). You get the idea. 

  7. If you’re the opposite and get full quickly (especially if you find it’s too much food in the beginning), opt for heavier choices. A stir fry of broccoli and mushrooms will be much smaller than a raw salad, both weighing the same. You do you. 

  8. Try to secure your bright lines as soon as you can, create that habit and stick to it - don’t deviate, as it’s much harder to get back on track after slipping than it is to just stay on track. Trust me, that extra bite isn’t worth it. 

  9. Opt for clean choices whenever possible ~ whole foods over processed is always a better choice. Opt for whole grains, whole beans (you can make these yourself in a pressure cooker and freeze extras for later), raw or steamed veggies, roasted veggies to sprinkle over salads, etc. Your taste buds will change to absolutely love these foods, and if weight loss is about reaching your highest potential for health, then it makes sense to upgrade our food choices to cleaner options. 

  10. My favorite way to dress a salad: 2 oz avocado, cubed, drizzle of apple cider vinegar, pinch of salt. Use tongs to toss everything together and the avocado and ACV make sort of a dressing which is just delicious. 

  11. Brush your teeth after dinner. Remind yourself the “kitchen is closed”

  12. Realize that the challenge of weight loss is temporary - you’re just doing it until you reach your goal weight. The add-ins for me at maintenance were life changing - I honestly can do this for life, knowing I can add a little grain at lunch, an extra protein at breakfast, etc. Just make it through the weight loss phase, create the habits, keep going, and then it will be automatic. 

  13. Find people in your area that are also doing BLE, join a support group (hey, we have one!), create a mastermind group, or simply get a buddy. There is power in teams. Create what you need if you can’t find one. 

  14. Make foods delicious and pleasing to the eye ~ include more colors (think pink sauerkraut, orange peppers, purple potatoes, etc) and really enjoy it. This isn’t drudgery, it’s a beautiful journey! Eat with your eyes first and you'll find that you don’t want to overeat. 

  15. Whenever I say “well, I’d like a little of this….” or “everyone else is having it”, I like to remind myself ~ I’ve had 41 years of trying that food out. I know what it tastes like. Seriously, I don’t need need to taste it again to remind myself. With that in mind, I’ll keep my plan. Keep to the plan. 

  16. Stop chewing gum. For the first two months, I still had cravings for sugar, and couldn’t figure out why. I then stopped chewing gum (with xylitol) and my cravings for sugar went away.

  17. Your body may not be perfect at any point of the journey, even at goal weight. It’s ok ~ our body is our body and we can learn to love it with all its imperfections. Have gratitude for your journey and the work you’ve put in, and give your body the respect and pride it deserves for doing all that work!

  18. In the middle of my journey, I started to lose my bright lines….I would eat extra hazelnuts, or some fruit with dinner, and I would feel guilty and negative about it, judging myself, berating myself. Loose lines, strict heart. The opposite would be: stick to your bright lines, and show your body compassion. You can’t force your body into weight loss. You can’t judge yourself into submission. Get back on track, but soften up with yourself emotionally. Strict lines, soft heart.

  19. At the end of the day, ask yourself why you’re doing it. Remind yourself that now is the time, not later. Remind yourself that you’re worth it. Remind yourself that when you fall, just get back up. Even if it’s 17 times down, 18 times up.

  20. One night I had a dream with Susan Pierce Thompson. I told her “what do you do when….” and she said “just stick to the plan”. I said “but you know how hard it is when….” and she said “just stick to the plan”. Your mind will wander, your desires will change, your cravings will come and go, but keep your plan cemented. Just because you feel it or think it, doesn’t warrant a reaction. Just observe, acknowledge, and stick to the plan.


Late Summer Minty-Collard Smoothie

Screen Shot 2019-08-29 at 1.57.34 PM.png

If you're like me, you have a plethora of collards in the garden now, getting big and getting ready for a delicious fall. They are wonderful for making wraps (instead of tortillas), chiffonade into salads, massaged into more salads, but still, I find that I run out of ways to use them; so we get creative. Adding them to your smoothies is a super easy way to get 4 or 5 large leaves (and I'm talking a little under a foot long). They are crisp, green, and filled with fiber and nutrition. 

Also, these smoothies are a great way to get in more mint as well. Mint is refreshing, cool, fresh, and bold and mixes really well with summer fruits. So why not? Indulge in a late-summer minty fresh smoothie. 

3-5 large collard leaves, washed, destemmed and torn
1/2 bag of frozen organic strawberries
2 cups loosely packed mint (about 10 sprigs, without stems)
2 frozen bananas, in chunks
water to fill vitamix pitcher 1/2 way

Blend away and enjoy. This makes enough for two and then some.

Raw Spicy South African Cashew Bisque

A couple of years ago this August, I attended Living Light Culinary Institute in California. I had the best time of my life, having won the "Hot Raw Chef" Scholarship in 2015. I had an absolutely wonderful time, meeting new friends, cooking (or un-cooking) up a storm, leaning new tricks of the trade, renewing my knife skills, and coming up with many healthy recipes. 

This South African soup was the result of an assignment we had been given. I had great fun working with my partner Nadine, who had a discerning palate, a kind heart, and only supportive words to share.... I miss those times! I remember blending, tasting, adding something else in, blending, tasting...for almost 45 minutes! I'd close my eyes to taste the exact texture and flavors, and get it just right. Consequently, it's one of the LONGEST list of ingredients I've ever worked with, but I promise you that it's the perfect tribute to its cooked counterpart. And even healthier for you! 

Warming, soothing, with a hint of cinnamon and spice. Makes 4 cups, about 4 one-cup servings or 8 half-cup appetizers. 

Ingredients: 

2 zucchinis, peeled & chopped

4 red peppers, seeded, filed and chopped

1 cup water

1 cup cashews, soaked

6 dates, pitted & chopped

3 garlic cloves, microplaned

3 teaspoons salt

2 tablespoons Tamarind Paste

1 two-inch knob of ginger, microplaned

2 teaspoons paprika

1 teaspoon onion flakes

1 teaspoon dehydrated tomato powder

1 teaspoon cinnamon

1 teaspoon cumin

1/4 teaspoon cayenne


Garnish: 

2 tablespoons cilantro, minced

2 tablespoons cashews, minced

2 tablespoons scallions, minced

2 tablespoons red pepper, minced

2 tablespoons cucumber, minced

2 tablespoons yellow pepper, minced

In a blender: blend zucchini, red pepper, water, cashews, dates, garlic, salt, tamarind and remaining spices until smooth. Continue to blend until the canister of the blender starts to feel warm and the soup begins to heat a little. Taste for seasonings; garnish each serving with the minced cilantro, cashews, and a concase of pepper,s cucumber and scallions. Enjoy! 

Cherry Tomato Freezer Sauce

There are many ways to make tomato sauce, but this couldn't be more simple and more delicious. At the moment, we have so many tomatoes in our garden that it's hard to keep up, and I haven't yet entered the curious world of canning (soon, though, soon!) So for the time being, I freeze and it suits me just fine. 

But cherry tomatoes...who ever heard of using cherry tomatoes? Well, cherry tomato sauce is all over the internet, and here's my version (although all of ours are basically the same sauce). You can add in different herbs, even red peppers, mushrooms, make it your own. 

Simply gather enough cherry tomatoes so they lay in a single layer. I used 9x11 pan, and therefore had about 4-6 cups of tomatoes, although the size of them will dictate the amount. As I'm leaning, there are so many different types of cherry tomatoes, some small, some bigger, and I even threw in some regular tomatoes in the mix as well to fill in some gaps. Just get them all in one layer for the pan you're using. 

IMG_6196.JPG

Drizzle with a little olive oil, and throw in about 2-3 cloves of garlic, still in their skin. Roast at 350 degrees for about 45 minutes, until their skins have broken and released some juices. Let cool, and process in a food processor with some salt and pepper to taste, and freeze in individual bags, laying flat. Once frozen, you can stand them all upright in the freezer and they won't take up much room since they're flat. That's it - voila! And you were worried you wouldn't get to make tomato sauce this season! Get to it!

Summer Tomatillo Gazpacho

There’s just something about gazpacho. It’s a win win ~ a win for your garden, and a win for your taste buds: your garden provides pretty much everything you need, and it’s pretty much the best damn soup you can ever make. If you don’t grow your own food, the farmer’s market will do it for you AND everything will be picked at peak ripeness, with all the flavors of summer. It might seem a bit labor intensive, but with a food processor, you’ll make it zippy fast. Plus, it’s an easy lunch you can enjoy happily for 3-4 days.

Tomatillos growing in the garden. They have a paper like outside that you peel off, revealing a smooth green fruit inside. I think they look a little like little lanterns.

Tomatillos growing in the garden. They have a paper like outside that you peel off, revealing a smooth green fruit inside. I think they look a little like little lanterns.

I really like the addition of tomatillos in this soup. They're add a unique element of citrus, sweet, and fresh that I really love. They're also a little fruity, and I've been know to eat them like an apple. Try it! Just be sure to wash off the sticky residue from underneath the paper skin (which by the way is totally normal, nothing to be alarmed by). 

Paper-like skin.

Paper-like skin.

I've added a can of crushed BPA free organic tomatoes in the mix, simply because I love the richness of tomato flavor and the deep red color that it provides. If you wish, you can just replace this with fresh tomatoes, although the taste will be different and the soup will be more pink than red. Either way, they both work. 


2 large cucumbers, peeled (optional) and chopped

1.5 cups peeled and chopped tomatillos

2 green peppers, chopped (or a mixture of colors)

4-5 cups fresh tomatoes, chopped

1 medium red onion, chopped

One 28 oz can of crushed organic tomatoes, BPA free (or extra tomatoes) 

Large handful cilantro, chopped

4 small garlic cloves, microplaned

1 tsp sea salt

1-tablespoon raw apple cider vinegar

Freshly ground black pepper

In a food processor, process the cucumbers, tomatillos, peppers, fresh tomatoes, and onion in batches (still a little chunky but like thick soup). Pour out into a big mixing bowl. Add in the crushed tomatoes, cilantro, garlic, salt, vinegar and pepper. Combine well with a large spoon, and taste for seasoning. If you want the extra fat, feel free to dress with a drizzle of olive oil and/or chopped avocado.

Minty Cucumber Tzatziki Sauce

IMG_5462.JPG

July and August are the perfect months for inundating yours house with cucumbers. Seriously. We can’t eat them all. Where did they come from? Where did I go wrong? How many plants did I actually buy? Without the guilt, I set to work ~ of course, I share with family, friends, neighbors, I pickle the raw fermented way, I can them as well, we eat them raw, and then….comes this pretty knock-out tzatziki sauce that is soon going to be your best friend, labeled on top of everything.

As with most of my recipes, it’s quite easy. But I love a lot of flavor, and my favorite thing is to use what’s already in the garden. The perfect marriage of local, seasonal food. It doesn’t get better than that.

Again, I won’t bore you with exact measurements. I always say, “it’s not math class over here”. Just do your best to make it your way, and enjoy the process!

IMG_5252.JPG

I do love this cashew yoghurt, if you can find it. Alternately, you can use almond yogurt, or any other plant-based yogurt (you can even try to make it yourself!) as long as it’s unsweetened and plain.

The authentic recipe is to drain your cucumber after you cut it. If you think you’ll eat this all in one sitting as a family meal, you don’t really need to. If you want it to hold out a few days, then yes, I would drain it.

1 pickling cucumber, chopped pretty small or grated, drained

1/2 cup plant yogurt

pinch salt

1/4 cup chopped dill, mint and parsley

Combine ingredients together, and let sit in the fridge (if you can hold out!) for about an hour. I usually don’t, but it does taste better if you give it some time to rest.


Quick Herbed Harvest Potato Salad

IMG_8093.JPG

If you’re like me, you wait for August with an open, excited heart. I’ll be honest - it IS about the potatoes, but it’s also about the room they clear for me to plant other things. I harvest 4 plants and I get about a yard square of new space for me to start plangent my fall items (kale, lettuces, radishes, etc.)

This potato salad is a simplified, no-fuss alternative to German potato salad, but with all of the flavor. If you have fresh potatoes from your garden (or the farmers market), you really don’t need anything complicated to make them taste outstanding, as they do that on their own. This would be a great side recipe for a family dinner, or an addition to a potluck. Also, I won’t insult you by giving you exact measurements, because I truly don’t cook that way. Just eyeball it, and taste for flavor, and you won’t be disappointed. This isn’t math class!

IMG_8094.JPG

You can use any herbs you have on hand - tarragon is amazing, oregano and thyme. I especially love chives, parsley and dill, as the combo is perfect for this salad.

Two handfuls potatoes, boiled, then cooled and chopped into bite-sized pieces

1/2 medium sized red onion, sliced thin (or not!)

A drizzle of olive oil

A drizzle of raw apple cider vinegar

Salt and pepper to taste

Few tablespoons of your favorite herbs (I used chives, parsley, and dill)

Combine ingredients together, and taste for seasoning. This salad does really well with the addition of chopped dill or parsley, also (or both). Make it “herb-y”, and make it your way!

DIY Peppermint & Thieves Mouthwash

IMG_7751.JPG

Hello, folks! I wanted to share a recipe that I've come to LOVE to make on my own, using this fancy dressing bottle (glass). And it's so easy that you too can make it. 

Here are some reasons why I love DIY:

1. It's a creative outlet. By making something ourselves, it helps us slow down and use our senses to create something we truly love.

2. It saves some cash: as you'll see by the ingredients here, you can create chemical-free mouthwash that tastes great with inexpensive ingredients. In fact, with just the peppermint and thieves oils, you can have almost unlimited mouthwash for the next year. 

3. It saves resources and the environment: every time you use mouthwash and recycle the bottle, there's still energy that goes into recycling....if you just make your own DIY using glass containers, you also give a little back to mama Earth, which is always a good thing. 

4. It saves you a trip to the store! And when do you run out of mouthwash? If you're like me, it's when you're brushing your teeth at night and you realize you're low. So I've actually made this at 11:00 at night, in under a minute. That saves me time, driving, and money. 

5. Best part, it's chemical free! Even the mouthwashes out there that are natural and pure have a bunch of ingredients I still can't pronounce. I'm not saying they're not safe or even effective, as many of them are. I just like to know exactly what's in there, since it gives me peace of mind. 

Note: please do not use store bought oils for this recipe (or any recipe) ~ many of them are fake, impure, or even hazardous (they often say do not put on skin, so you may not want to ingest them). If you have questions about oils or where to get them, please reach out and I'd be happy to guide you. 

IMG_7750.JPG

Ready, set, go!

Ingredients:

Glass container (I just washed out a salad dressing bottle)

15 drops Young Living Peppermint Essential Oil

8-10 drops Young Living Thieves Essential Oil (try it first, I went up to 15 and it was spicy!)

1/2 tsp salt (may omit, since it tastes a little funny but it's so healthy for your mouth and gums!)

1 tsp baking soda

Combine the ingredients together in your bottle. Fill up with distilled or purified water. Label, and you're done!


Make Your Own Hot Pepper Flakes

IMG_9469.JPG

The garden this year has been pretty prolific, and we’ve been getting some nice hot peppers in the mix. I do love hot sauce (mostly because it’s a little bit sour too), and adding chili flakes to my food (I actually find them flavorful but mild in heat). I tend to add raw hot peppers only to salsa, and just a little bit. Which leaves me with a handful of hot peppers that I end up dehydrating and turning into my own hot pepper flakes. It’s pretty easy and it yields a very flavorful pepper flake that you grew yourself. Nothing feels better than growing something yourself and reaping the rewards.

This recipe is short and easy, but something you may not have thought of. Enjoy!

Pick your hot peppers red if possible, and let them continue to dry in the sun (or a sunny window). Alternatively, you can pick them red and dehydrate at 112 until completely dry ~ you have to sort of play with it a little bit, but you want dry red peppers in the end. When completely dry, transfer them into a coffee grinder, and grind into a consistency you enjoy as a pepper flake. Enjoy! These should be stored in an airtight container.

IMG_9470.JPG

Blue Ocean Creamsicle Chia Pudding

31CE8183-B1BF-4E24-9403-F20D13BF4767.JPG

I’m going out on a limb to say that maybe you’re all pretty well versed with chia recipes, since there are thousands on the internet at this point. But maybe you’re not secure on the ratio of chia to water. Fret not, I’m here to help. You may also not be sure how to flavor it so it’s super delicious, and healthy for you. Fret not, I’ve got you covered there too. And on top of that, if you’d like to raise the superfood qualities of it adding in some seaweed power to make it pretty blue? I’ve got you there too. Read on.

FullSizeRender.jpg

Basic Recipe: My favorite ratio for chia pudding (one serving) is: 1 oz chia, 7 oz almond milk. You can use any kind of milk, actually, or even do 1/2 milk, 1/2 water, all of these are great choices.

Make it yummy: you can add in stevia (I choose not to since I buy unsweetened vanilla almond milk or make my own, and in both instances, I find it a little bit sweet). To make the creamsicle version of this, you’ll add 2 drops Young Living Vitality orange essential oil and a splash of vanilla extract of vanilla powder. Easy peasy! There, my friends, is my favorite way to make chia pudding.

Spruce it up: However, if you’re looking to make it over-the-top good for you, you can try adding in this gorgeous blue powdered spirulina. Trust me, you won’t taste it, but it will look like the ocean, and when you make your food pretty, it’s always a good thing. Spirulina (and all things green) are very good for you too, offering chlorophyl and protein. The brand I love the most is from Klamath Lake in Oregon, and you can learn more about it here (note it is an affiliate link, because I love them so much). You can also add in other powders that you like, such as maca, cinnamon, etc.

FullSizeRender_1.jpg
E8597DD6-2231-4BAE-8095-3C8C00527C00.JPG

So, without further ado, here’s a quick recipe that a 10 year old can do. But trust me, you will want to eat it all up yourself. It basically tastes like an orange creamsicle that’s blue :)

1 oz chia seeds

7 oz almond milk (or milk of choice)

pinch salt

1 tsp vanilla extract, or a sprinkle of vanilla powder

sprinkle of cinnamon

2 drops Young Living Orange Vitality Essential oil (optional)

1 capsule (or 1.5, go crazy) blue Majik powdered seaweed (here’s the link again)

Ball jar

Combine all ingredients together in a ball jar. Give it a good shake and leave it on the counter for about 3 minutes. Shake it again, making sure there aren’t any lumps at the bottom. Refrigerate overnight and enjoy in the morning with some nuts, fruit, or anything else you’d like for breakfast. Alternatively, you can eat this during the day, just make sure it sits overnight in the fridge to solidify.

DIY Outdoors Spray

IMG_7179.JPG

I absolutely love the outdoors ~ gardening, hiking, going to the beach, reading in the grass, playing frisbee....breathing in fresh air is the best medicine for me. However, I'm finding that sometimes it's not always totally pleasant, depending on where you go, and depending on how many outdoor pests follow you along for the ride.

I wanted to share a DIY Outdoors Spray that not only smells amazing, it's also a safe, non-toxic, natural barrier against such situations. I hope you love it as much as I do! I tend to spray it on my shoes, ankles, wrists, neck, and any other exposed skin. Plus it has a little peppermint in there for a little cooling sensation, which is great in super hot weather. Hope you enjoy!

1/2 cup witch hazel (original or other scents are fine ~ I used Lavender, see below)

1/2 cup purified water

8 drops Geranium Essential Oil

8 drops Citronella Essential Oil

5 drops Cedarwood Essential Oil

5 drops Peppermint Essential Oil

5 drops Eucalyptus Essential Oil

3 drops Lemongrass Essential Oil

1/2 tsp salt (helps the oils disperse better)

Pour into a 1-cup spray bottle and shake well before use. 

IMG_7178.JPG

Coconut Raspberry Ice Cream

Soon are the days when we get to go to the beach, enjoy the sunshine on our backs, make cooling drinks and refreshing desserts. It's a normal April day, at 77 degrees! Spring is still here but this past week has felt a lot like summer, so we've needed to try out some fun new dessert recipes to cool us down. Of course, it goes without saying, this is low-glycemic and diabetes friendly (although you should still check your blood sugar if you're sensitive). The only sugar here comes naturally from the raspberries, which happen to be the lowest sugar berry around (even topping the superstar blueberry!)

This ice cream has a medium firm body, tart raspberry flavor, and has a mellow sweetness from the stevia - the texture actually almost like a sorbet ice cream mixed together. Is there such a thing? Now there is. 

This is pretty heavy on the coconut, which I love, but the taste will change with whatever brand to use. You can also decide to use half coconut milk and half almond milk for something a little lighter, although it will alter the flavor. Feel free to play around with this template! 

Also, if you like this recipe, you may want to check out our low-glycemic dessert book, found here. 

One 12-ounce bag frozen organic raspberries

1 can of your favorite coconut milk (or switch 1/2 out with almond milk)

2 full droppers of liquid stevia (start with less and taste for preference)

Combine all ingredients together in a full-powered blender (like a vitamix) and use the tamper to push everything down together into the vortex. You might need a bit of elbow grease here, as it won't be easy. It should turn out to be the consistency of soft serve ice cream. If you'd like it a bit more firm, feel free to then transfer it to an ice cream maker and process according to manufacturer's instructions. 


Low-Glycemic Mushroom Risotto with Peas & Rosemary

IMG_8463.JPG

Who doesn't love creamy, robust risotto with savory mushrooms, sweet peas, and herbs? Give me a plate! But if you've read my blog by now, you know I love low-glycemic foods so that I don't fall asleep after a meal. This meal is packed with fiber and that prized "umami" flavor from mushrooms (which literally means "deliciousness"), sweetness from caremelized onions and peas, a little kick from your favorite herbs.

The pasta itself is the brilliant part: it's low glycemic rice called "Miracle Rice", which is gluten free, soy free, and has zero calories. It's also made from....get this...konjac flour, which has also been used as a vegan gelatin, completely plant based, and doesn't spike blood sugar (but if you're checking blood sugar, be sure to check this one anyway as results are individual). Konjac is a root and has been used in Asian countries for over 2000 years! It's also high in soluble fiber, which we all need,  and they absorb the flavors of your dish (so on their own, they're pretty tasteless). 

Now, I want you to know that I'm not big on low-calorie foods in general, the processed kinds. I want food that's filling, whole, real and genuine. But I find that risotto rice is white, has a high carb content, and can spike blood sugars if you don't watch it. Who wants that? This is the best of both worlds: have your risotto and eat it too. 

You do need to read the package instructions to know how to prepare the rice. Initially when you open the bag, they smell a bit funky. That's totally normal, and the following procedure will take care of the smell. Rinse rice well, then soak in a bowl of boiling water for 2-4 minutes. Rinse again, and add in to the recipe below. 

1 tsp coconut oil

1/2 red onion, diced

a few pinches sea salt

2 cups sliced baby bella mushrooms

1/3 cup peas

one package Miracle Rice, prepared according to package instructions

a few pinches rosemary, fresh or dried

black pepper, to taste

Heat a skillet and add in coconut oil, onion and salt. Sauté over medium heat until the onions sweat and release some water (sometimes I do this with the lid on to help it along). Add in the mushrooms and allow them to release their juices, a few minutes, covered, over medium heat. Once the mushrooms are soft, add in the peas, rice, and rosemary. Cover and heat through over medium low heat, a few minutes. Season with black pepper, and enjoy. 

Black Bean Pasta Mediterranean Plate

This is simplicity at its best: seasoned black bean pasta (which happens to be low in carbohydrates and high in protein), lightly steamed kale, a chunky lemony artichoke tapenade, and gloriously sweet cherry tomatoes. It takes just minutes to prepare, and it is quite filling, which is really all you need when you're ravenous. And I was.

I'm always looking for alternatives to regular pasta. Although pasta is one of my favorite foods (actually, all food is my favorite!), I'm religious about upping the nutrition wherever I can. Black Bean pasta (Found here) is soy free, organic and made just with beans and water. How easy is that?   If you're looking for something silky smooth, this isn't it: black bean pasta is hearty, dark and rich has a naturally al dente taste, with a rustic bite.

The artichoke heart tapenade is surprisingly simple but complex in texture and flavor: hints of garlic, fresh lemon rind, and a creaminess that is easy to love.  

You can easily make this even more robust by adding in more mediterranean flavors: olives, sundried tomatoes, basil...feel free to play. 

This recipe may look like it has a lot of moving parts, but honestly it's quite easy if you time things right: Two pots on the stove (one for the pasta, the other for the kale) and make your tapenade at the same time. For me, it came together in about 15 minutes. 

Ingredients for pasta: 

1/2 package Black Bean Spaghetti Pasta, cooked according to package instructions. After draining, lightly season with salt and black pepper. 


Ingredients for artichoke hearts tapenade: 

1 can artichoke hearts in water, drained

1 can artichoke hearts seasoned in oil and spices, liquid drained by half

2 cloves garlic, microplaned

the rind of one lemon, microplaned (just the top, no white pith)

sea salt and ground black pepper to taste

In a food processor, combine the artichoke hearts, garlic, lemon, a few pinches of ground black pepper, and sea salt. Pulse lightly so the texture remains chunky. Taste to check seasoning, and leave aside. 


Ingredients for Kale: 

2 cups kale, torn, and lightly steamed until bright green, about 1 minute

drizzle of olive oil

squeeze of lemon

sea salt

chili flakes (optional if you like the heat): I didn't add them but will next time.

Toss the kale with lemon and olive oil and season to taste with salt (and chili flakes). Leave aside.


Decoration:

1/2 cup sliced cherry tomatoes.  


Assembly:

Start by plating the pasta, then the kale, two scoops of the artichoke tapenade and some sliced cherry tomatoes on the side. Enjoy! And as pretty as it was all plated, when you get into it with your fork, feel free to make a mess of the whole thing.....like this....


Leek & Dill Soup

From the start, I have to state that this is my Romanian Aunt Anca's recipe and I fell in love with it from first taste. It's low in fat, full of fiber and vegetables, surprisingly sweet and savory at the same time, and absolutley delicious. This also fits really well in the "easy peasy" department as you don't have to babysit it much and it practically makes itself.

2 leeks, white part and a little of green, cleaned and chopped fine

1/2 zucchini, cubed (optional)

handful of peas

water to cover

1/4 cup chopped dill, saved for the end

Combine leeks, zucchini and peas and cover with water. Bring to a boil and cook until tender. You can blend 1/2 of it with an immersion blender until smooth, or leave it as is, chunky. Add in the dill, and season to taste with salt & pepper. 

You can easily add anything else to this soup you'd like: a potato, carrots, celery, etc. Enjoy and experiment.