Rosemary Gladstar's Perfect Cream (with Geranium and Lavender)

IMG_6468.JPG

I have to start out saying two things: 

1. Rosemary Gladstar is my hero. If she knew me, we'd be best friends. She just doesn't know that yet. 

2. Because of my deep respect for her, I cannot share with you her copyrighted recipe by giving you all of it.... Duh. That's like giving your hero's magic out for free. It doesn't work out like that in anyone's favor, karmically speaking. The way I'd honor her most is if I led you to buy her book, where not only do you get this incredible recipe, word for word, proportions, and details the way she'd have it set...but then you have an amazing encyclopedia of all of her body care recipes and more. Win, win, win, I think.  You can find it here. 

What I DID want to do was share my experience in making the cream, and to show you some minor adjustments I made to make it "mine".

So it's called, ROSEMARY'S PERFECT CREAM because, well, it IS perfect. Silky, smooth, relatively cheap to make, but it requires a few magic tricks: like patience, scoping things out, waiting, waiting some more, not being scared of loud blenders, and a little more waiting. It's also tricky because basically you're combining oils and water and they don't like to mix. I've never NOT made it in a vitamix, so I can't advise those of you who don't have one, and you do need the tamper so make sure you have that. There rest is in timing. And don't rush the process. 

Changes I've made to suit my taste, all of which will be explained below: 

Replaced coconut oil with Shea Butter

Replaced distilled water with floral waters such as hydrosols

Added in essential oils

IMG_1845.JPG

So here we go:

Part 1, you heat over a double boiler some almond oil and coconut oil ~ however, lately I've been getting into Shea butter instead of the coconut oil. I love to cut it thin and add it to the pot to melt. 

IMG_1832.JPG

Additionally, you'll add beeswax to the oils, to melt right along (again, exact amounts of each in her book). Note: I used the pellet beeswax because it was easier to measure (see pictured below), but feel free to cut into bars if you need to. 

IMG_6471.JPG

Once these ingredients become liquid, you pour the mixture into the vitamix vessel and let cool until it looks like petroleum jelly, opaque, and creamy. Don't be fooled by the top layer, dig a spatula in to make sure it's that consistency throughout. While this is cooling in the vitamix container, go to part 2.....

Part 2, she creates a blend of "waters" to be mixed in to the wax mixture above. I like to doctor it up a little bit in my own way by using hydrosols or floral waters in place of distilled water that she calls for. You'd also be adding in some aloe vera (this is the one I used), 1/2 tsp vitamin E, and I personally added the following oils for an amazing aroma:

1 drop Young Living Geranium essential oil,

5 drops Young Living Lavender essential oil,

and 5 drops Young Living Elemi essential oil (also known as "poor man's frankincense"). 

IMG_6470.JPG

THE MESSY & LOUD PART: This is where you blend in the waters to the beeswax mixture. Mind you, oils and water don't mix well, but somehow this cream works ~ almost like an emulsification. So here goes....when the beeswax mix is the right texture, start the vitamix (it will sound a bit violent, but rest easy and just work up slowly), and then slowly add in the waters mixture in a small stream (as the motor is running). Run it for about 20 seconds, using the tamper to help it along, then stop and scrape the sides down. Run it again until everything is smooth, well blended, and the color changes from yellowish to white. And you're done. 

I like to pour the whole mixture out back into my glass measuring cup so it pours into the small containers easier, as pictured....

IMG_6472.JPG

That's the gist of it, but Rosemary has some pretty awesome details and tips to make this work well, because the truth is, it doesn't ALWAYS work. Again, timing is everything. If you look at step 1, when it says make sure the beeswax mixture looks a little like petroleum jelly throughout ~ one time I didn't wait long enough, and I ruined the whole thing. 

Parting words:

1. I would like to say that for my skin type (oily, mostly), I would not put it on my face - it's too rich, so it goes best for my hands, feet, knees, elbows, and legs. But do as you'd like, as you know your skin best. 

2. I won't lie, cleaning the vitamix container is a pain in the butt. At the same time, I make this cream twice a year and that pain in the butt is totally worth it. One thing I've found is, if you remove the blade completely and scrub everything with a pasty mixture of: 1 cup baking soda combined with a few tablespoons dish soap and a sponge, you'll get it clean in under 2 minutes. Just use as little water as possible. Then spin it in the dishwasher for good luck and you'll be amazed. But if you want to wash it just with dish soap, you'll basically never get it clean. 

And most of all, have fun making it year after year!


Low-Glycemic Garlic Noodle Love Bowl

Noodle bowls are incredible; can I get an AMEN? Stir fry's are fun, warming, filling and nurturing, especially when you're cramped for time, hungry, and it's a cold, rainy night. I've found that I can't tolerate regular noodles in general, however, as they make me sleepy ~ probably from a carbohydrate coma. High in gluten, high in flour and carbs that spike your blood sugar, they can seriously impact your health if you have them often. They also impede digestion, as they're made of flour, and can often constipate sensitive digestive systems. 

Recently I've found a brand of noodles made from Konjac Flour named "Miracle Noodles": they're low glycemic, low in calories, gluten free, soy free, and made in the USA! Best part is that they're super delicious, easy to use, require minimal cooking time, are low glycemic and won't make you sleepy after you eat them. Since they're low calorie and high in fiber, many people use products made from Konjac to help with weight loss, and are also sometimes used as a vegan gelatin substitute. That said, you just need to stock up on these packages, which come in rice size, angel hair, and fettuccine. You can find them here in a bulk pack of 6. 

The noodles do have a funny smell at first, I won't lie. You need to rinse them well, place them in bowl and soak in boiling water for 2 minutes (I go to 5 just to make sure), drain, rinse again and by this point, the smell will be completely gone.

You really can use any veggies you'd like ~ make it fun, and use whatever is in your fridge and whatever is your favorite. 

Ingredients:

1 tsp coconut oil

2 pinches of sea salt

1 clove garlic, sliced thin

1/2 cup sliced shitake mushrooms

1 cup sliced broccoli

1 small bunch thin asparagus, woody ends cut off, and sliced into 1 inch pieces

3 scallions, sliced in 1 inch pieces

2/3 cup of 1 package Miracle Noodles, Angel hair, rinsed well, soaked in boiling water for 2-3 minutes, and drained

2/3 cup Coconut Aminos Garlic Sauce

1 tsp white sesame seeds

a drizzle of your favorite hot sauce (I love Ninja Squirrel)

Heat a skillet over medium-high heat. Add in the coconut oil and melt. Add in the garlic & the sea salt, and sauté for one minute to release the flavors. Add in the mushrooms, broccoli, asparagus, and scallions and sauté another 3 minutes or so, stirring often to prevent sticking, until the veggies turn bright green. Add in the sauce and noodles, cover and turn down to medium heat just until heated through, about 5 more minutes. Place in two bowls, sprinkle with the sesame seeds, and a drizzle of your favorite hot sauce. Makes two servings.

NOTE: One time when I didn't have the garlic sauce on hand, I actually used a little bit of vegan Worcestershire sauce and some vegan hoisin Sauce and it came out really tangy, dark, rich and delicious. Feel free to experiment. 

Orange Clove Carpet Deodorizer

IMG_0673.JPG

Recently I hosted a fun DIY household cleaning products class, and we made 6 lovely recipes together with friends….one of them was this DIY Carpet Deodorizer. With just a few natural and easy to find ingredients, you can make yourself a batch to use at home in no time, without the harsh chemicals. The aromas are so refreshing and sweet! Here are the deetz:

IMG_0674.JPG

1 cup baking soda

10 drops orange essential oil

10 drops clove essential oil

8 oz glass jar plus daisy lid (I get mine here)

In a bowl, combine 1 cup baking soda and essential oils. Add to an 8 oz ball jar and use a daisy lid to shake powder on the rug or carpet. Leave on for 10 minutes, then vacuum as usual.

IMG_0667.JPG


Low-Glycemic Lime Mint Smoothie

I feel in love with this smoothie when I first saw this video, titled "Limey Love Shake" by Chef Shelley of PH Miracle. It's literally the perfect smoothie: only veggies, lime and stevia as the sweeter, and it's so cool and refreshing from the mint and ice! It's literally a dream, the first time I had it. I alternate the greens, but for the most part, have something like this almost every other day. 

I also came across Chef Shelley through the writings of her husband Dr. Young of the PH Miracle. They've done amazing work together to heal acidic states in the body through raw, alkaline foods. I noticed a huge difference when I took their advice and added green powders to most of the water I was drinking through the day, and incorporating this smoothie into my diet. 

Of course, I can never do the same recipe exactly the same way: I decided to alter the recipe a bit in my own way, based on my tastes. Here's my take on the "Limey Love Shake":

1 long english cucumber, sliced

1 large handful of kale, torn

2 limes, peeled

2 full droppers of liquid stevia

1 large handful mint (I put in about a cup)

1 full tray of ice

1/2 avocado

Toppings: cacao nibs and/or unsweetened coconut shreds, optional. 

Blend the cucumber, kale, limes, stevia and mint with enough water to cover ingredients about halfway. Add in the ice and the avocado last, and give it a fast whirl (you don't want to blend the avocado too much as it can turn foamy.) Top with toppings, if using, and enjoy! 


Lavender Grapefruit Foaming Hand Soap

IMG_6406.JPG

I've always been conscientious of what we throw away, and even more importantly, what we can choose to up-cycle and use in additional ways. So if you've had some foaming hand soap dispensers laying around (or even better, if you thought you needed to buy another), then this post is for you. For under 2 minutes and for a handful of change, you can have yourself a brand new replenished bottle of foaming hand soap, and it smells terrific too.

I can't claim the template as my own recipe, and I give credit to watching this beautiful Youtube episode all about castle soap....but I did think blending lavender and grapefruit was a pretty groovy idea. 

So here's what you'll need:

1 empty foaming hand soap dispenser (reuse an old one preferably)

5 drops Lavender Young Living Essential Oil

5 drops Grapefruit Young Living Essential Oil

1/2 tsp sweet almond oil

1 tablespoon Unscented Dr. Bronners Castille Soap

IMG_6405.JPG

our the essential oils, sweet almond oil, and castle soap to the empty bottle. Fill almost all the way up with filtered water (not all the way to the top so that the pump can fit). Put the pump on, close, and shake to combine well. Label as you wish!

How easy was that? I like to fill up multiple bottles at one time so that I can do it and be done with it. Easy peasy. 


Light Breakfast Bowls

Breakfast is a funny thing. Sometimes I wake up and don't have to eat until 11:00 am. Sometimes I'm ravenous at 6:30 am. Most of the time, I keep it simple and just have a satisfying protein smoothie, but there are some days when I want something light and refreshing.

These are two of my signature bowls that I've made over and over and they fit the bill perfectly. The first is tart, sweet, and just the right thing when I need something to hold me over, but I'm not starving. The second is a little more substantial and holds me over for longer...but it still follows the same formula. Some fruit and almonds. Love the both and hope you enjoy them as much as I do! Interestingly enough, they're sweet enough (but low-glycemic) to pass for a dessert. 

GRAPEFRUIT ALMOND BREAKFAST BOWL:

1 grapefruit, cut in half, flesh scooped out

1 banana, sliced

a handful of pumpkin seeds.

Combine ingredients and enjoy.


COCONUT YOGHURT BLUEBERRY BOWL

1/2 cup unsweetened coconut yoghurt

1/2 cup blueberries

a handful of slivered almonds

Combine ingredients and enjoy.


Enjoy! And let me know what you're having for breakfast! 

Five Essential-Oil-Infused Nourishing Hair Serum

I hosted a haircare DIY class last summer, with the idea being that our hair needs the most support in the summer ~ there’s damage from pool water, sun, etc. However, this winter I’ve come to realize that our hair needs all the help it can get, especially in winter months: think hat head, and forced hot air, and extra hot showers which help you warm up but do a number on your hair and scalp.

While there are a lot of recipes that I use (like a shine spray and a scalp spray to tame that “hot-shower-angry-scalp!) The hair serum is something I do between washing days and I have fly-away’s. But you can use it to moisturize curls and strands in general, and even weigh down hair (just a little) that has a mind of its own. Think “bed head” that’s unruly. Unless that’s your type of thing, and if it is, more power to you!

Without further ado, I think this receipt is just as relevant in March as it was last August, and here it is….

IMG_9668.JPG

Five Essential-Oil-Infused Nourishing Hair Serum

15 ml dropper bottle (I used these)

Grapeseed Oil or Jojoba Oil

40 drops Jamaican Black Castor Oil (I used this one)

10 drops each: Copaiba, Tea Tree, Rosemary, Lavender, and Cedarwood Essential Oils


Combine all essential oils into the bottle and swirl to blend. Add 40 drops of Jamaican Black Castor oil and top off with the Grapeseed (for straight or fine hair) or Jojoba oil (for coarse or wavy/curly hair). Swirl bottle to blend. Use 2-5 drops. Rub hands together to warm up the oil and apply to the ends of hair first, working your way up to mid-shaft. Do not apply to roots or top of head. Use the small leftovers to gently pat down flyaway hairs. (Recipe adapted from Jen O’Sullivan. Her books can be found here).

Vegan Coconut Bacon

Sooo...who doesn't like bacon? Everyone loves bacon.

Who loves heart disease? Nobody loves heart disease.

There are some foods, like coconut in this instance, that really take on the flavors they are paired with beautifully. When you mix coconut with coconut aminos, liquid smoke and stevia, you get this amazing layering effect of flavors...umami, sweet, savory....and you really get the bacon flavor coming through. 

I used this particular recipe as a template, but tweaked it a bit so it's lower glycemic. Also I chose to dehydrate it instead of baking so you retain the coconut enzymes and it's essentially a raw food, and also opted for coconut aminos over tamari (which means they're soy-free!) So my take on the recipe is as follows:

3 cups large flaked raw coconut

3 tablespoons coconut aminos

2 tablespoons liquid smoke

1 full dropper of liquid stevia

Combine ingredients together, layer on a Teflex sheet and dehydrate overnight at 110 degrees. No need to flip. Store in air-tight canister and enjoy! 


Butterfly Pea & Lavender Bath Salts

I want to begin this article by the desire to say: I’m not here to burst anyone’s bubble, I promise! Not all things that we read and see are true, and we have to follow through with looking at research whenever possible. In fact, I looked up the benefits of epsom salt to see if it was clinically verified, and found this article. Sigh.

It may not do everything people think it does, but that may be ok. I don’t take baths because I’m lacking magnesium, trying to treat pain, or trying to beat winter blues. Simply put, a warm bath with scented petals and aromas may just feel absolutely amazing and relaxing, whether or not the salts are the cause. That’s what I’m going for.

IMG_9493.JPG

A couple of things before we start: you can use Sea Salt, Epsom Salt, or Epsom Salt Crystals (seen here). Or a mixture. Play with it, have fun, and don’t stress too much about it. Use what you can find.

For flowers, I love using rose petals, lavender flowers, or blue Butterfly Pea flowers. The blue pea flowers are usually made into a tea, but I love using them in the bath because they make the water blue. All of these flowers can best be found at your local apothecary, herbal store, amazon, etc. (pea flowers pictured below, right).

IMG_9495.JPG

The essential oils you use here are also forgiving - if you don’t have rosemary, use sage. If you don’t have lavender, use rose, or jasmine. Play with combos you enjoy. Just remember that the citrus is photo sensitive, so you have to wait a while before going outside in the sun.

IMG_9494.JPG

RECIPE:

1 cup Epsom Salt (or Dead Sea Salt, or a combo)

2 tablespoons dried lavender buds

2 teaspoon dried Herbes de Provence (the kind you cook with) ~ you can also sub dried rosemary

2 teaspoon dried Butterfly Pea flowers (something like this)

5 drops Rosemary essential oil

5 drops Lavender essential oil

Combine ingredients together. Add ½ or the whole batch of salts in a standard sized tub while the water is running to help them dissolve. I like being surrounded by the flowers, but if you’d rather have them in a tea bag (like this) to strain (or muslin cloth) and have less clean up, that works too. Just make sure that you squeeze the bag under running water to help it dissolve. Soak for 15-30 minutes. Use within 1 week, or store in a sealed glass jar and use within 6 months. *Recipe adapted from this amazing book.

IMG_9492.JPG

Smooth Greens Soup with Rosemary

The chillier nights are on their way as we soon enter November, and I long for soups that comfort and calm. Creamy soups have always been my love, but I don't always feel good eating them since they tend to be heavy and very fattening. Back in my dairy-eating days especially, soups were considered a light meal, but when you add in the cream and butter, they're anything but light! Inspired by one of my favorite chefs and authors Terry Walters, I've added in a few secret ingredients to thicken up the soup while still maintaining a lightness that I'm looking for.

It's all about the oats.

Terry taught me to use oats to thick soups and it works wonders in this recipe! Also I've added in just a few cashews to make it a bit heartier, but the whole fat is still light: there's only 1/4 cup in the whole soup pot! Hope you enjoy it. And if you want to add in curry, italian spices, anything you'd like ~ this is just a template so feel free to play with your food.

A little side note: We love buying heads of broccoli instead of the precut broccoli bags. The stems are great for juicing, munching on, and they're loaded with nutrition. The other day I realized I had collected 6 stems, so I I peeled and chopped them all and used them in the soup. They're a great way to use up the stems that few people know what to do with. Just get to the inner core that's sweet and crunchy and avoid the thick exterior. If you don't have stems this time around, just substitute with more broccoli florets.

one yellow onion, diced

4 cloves of garlic, diced small

1 tsp coconut oil

6 broccoli stems, peeled and chopped (or just add more broccoli)

florets from one head of broccoli, chopped

1 small zucchini, chopped

1/4 cup rolled oats

1/4 cup cashews

water to cover veggies by 1 inch

1 tsp sea salt

1 tsp dried rosemary

plain unsweetened coconut yoghurt, optional

Sauté the onion in  1 tsp coconut oil for about 2 minutes. Add the sea salt so that the onions sweat a bit, then add in the garlic and cook for 1 minute more. Add in the broccoli stems, broccoli, zucchini, oats, cashews, rosemary and enough water to cover the ingredients by about an inch, cover, and cook for at least 25 minutes on medium. Stir occasionally and when the veggies are tender, use an immersion blender to blend the soup well. Taste and adjust the salt if needed. Serve with crushed pepper and a tsp of coconut yoghurt if desired. Enjoy! 


Fire Cider

IMG_0978.JPG

I've been enjoying fire cider for some years now, and have had the joy of teaching a workshop at Kula Farm for the past two years. We all gather around, cut up ingredients, fill our jars and add cider vinegar, and then we wait. For a while. Strain, add honey, and just in time for the cooler months when we want a sip of something warm, spicy, and also immunity-boosting.

It’s very easy to make and it’s especially fun to make with family and friends (communal is best). It’s spicy, pungent, sweet, and for me, I’ve found it to be a great way to get my bronchial airways cleared. You can take a tsp or so with a meal, diluted or not, of you can add a splash to rice, dressings, soups, sauces, etc.

I first learned about Fire Cider from Rosemary Gladstar, a wonderful herbalism teacher and master. You can find a video of her making it here. Mountain Rose herbs also has a great recipe that I typically follow, and you can find it here.

IMG_1359.JPG

While this is a folk recipe, and the amounts (and even which) ingredients you use tends to vary and change with your mood, locale, season, etc…..I do like to use the base recipe above, and then you can spruce it up with whichever additional ingredients you want.

IMG_9415.JPG

The base is typically horseradish, onion, garlic, chili, and ginger. In the past, I’ve added cinnamon, cloves, black pepper, lemon, turmeric, rosemary, herbs….maybe all of them at the same time, maybe a select few. Enjoy the process, and let me know which add ins are your favorite! And remember to shake it daily, burp it (release some of the gas), strain after about a month, and then add a little bit of honey if using.

Happy Fire Cider Making!

IMG_1417.JPG


Cinnamon & Pumpkin Seed Baked Pears

IMG_8826.JPG

It’s not uncommon to want sweet things during the colder weather ~ puddings, baked goods, breads, etc. But the flour/sugar equation isn’t always the best for us. I was hoping to remedy the sweet with something healthy, and for certain, these baked pears fit the bill. They’re a synch to make, and they’re beyond delicious and a great way to appease that sweet tooth without the flour (and dessert coma) afterwards. Plus I love that just with a few simple ingredients, these pears get transformed into a luxurious dessert you can even offer to guests, for a light post-meal sweetness.

Serves 2-4

Two pears (Bosc preferred but green are also fine)

1/2 small lemon, juiced

cinnamon

4 tsp pumpkin seeds

coconut nectar

Slice pears lengthwise in half. Cut a small slit on the round outside belly of the pears so they can sit flat in the casserole dish. Scoop out the seeds using a melon baller or a spoon. Place the pears in the casserole dish, and squeeze the lemon over them. Add 1 tsp pumpkin seeds to each middle of the pear, sprinkle with cinnamon, and bake uncovered at 350 degrees for 30 minutes. When they are done, drizzle a little coconut nectar on the top and serve. These go great with some vanilla coconut yoghurt, or your favorite dairy-free vanilla ice cream. Enjoy!

IMG_8827.JPG


Herbed Aromatherapy Shower Tablets

IMG_8823.JPG

These days, when the fall weather brings its chill, I love to stay indoors and make things out of really good ingredients, to treat the body well. It’s a #hygge thing for sure, cozy and joyful. It’s also coming up to the holidays (sooner than we think!) so by brain is always churning, looking for things to make as gifts. As a simple person, I know that gifts can add up and especially if they’re unwanted or re-gifted again (I mean, how many scarves do we really need?), I want to make sure I give something that’s purposeful and possibly after used, there’s nothing to “store" around. These are wonderful in that way. They’re healthy for the environments since they’re non-toxic, they smell delicious, are easy to make, are a meaningful hand-made gift, and leave no residue behind of boxes, or things they have to deal with after they’re used. Win~win~win~win…..

IMG_8825.JPG

Of course, it’s a given that you want to use really high quality oils (which is why I use Young Living). After all, if you’re chasing the non-toxic life, you may as well buy non-toxic oils, right? That makes sense. But it helps to say it out loud, to remind ourselves that a lot of the oils bought out there are in fact not so non-toxic. It’s a sad situation for sure.

That said, the recipe is pretty simple….with a few adjustments from my own experience, detailed in the description below. Enjoy the process and enjoy the aromatherapy experience after!

Aromatherapy Shower Tablets: makes about 12 mini hearts

1 cup baking soda

1 tablespoon arrowroot flour

⅓ cup water

2 drops essential oils (I like Raven and Juniper) 

You’ll need a silicone mold, sort of like this one

Combine the baking soda and arrowroot, making sure there aren’t any lumps. Add in the water and make a thick paste. If it’s difficult to stir, which it often is, you can add a tsp of water or two to make it easier. Pour into a silicone mold, and let sit overnight. I’ve found that it helps to add an extra 8 hours to that as well (aim for about 1 and 1/2 days or so) I’ve also found that some water settles on the top, almost an hour after you’ve set them: if that’s the case, let it pour off gently as you tip the mold towards the side, making sure none of the actual white paste gets out. After they set, add in your essential oils to the top of them, two drops to each tablet (use the blend I suggested above or make your own!).

You can also try: Rosemary & Lemon, Peppermint & Lavender, Eucalyptus and Peppermint, Geranium and Lavender, etc.

IMG_8824.JPG

To use: Drop one or two tablets in your tub or shower away from the stream of water. Sprinkle a bit of water on the tablet to activate it. Breathe in the aromatherapy. Store in a cool, dry place. Use within the week, or store in an air-tight container and use within 6 months. You can also make this into a powder by eliminating the water: combing ingredients together, pour into a lidded glass jar, and sprinkle in the shower.

*Raven is a Young Living Blend that contains Ravintsara, peppermint, eucalyptus, lemon, and wintergreen.
Recipe adapted from Jules Aron’s Fresh And Pure book.

Calendula and Oat Botanical Soap

IMG_8749.JPG

At our most recent Make & Take, we used botanicals such as calendula and essential oils to create our own spa-experience DIY products. One of them was this amazing Calendula and Oat Soap. It’s super easy to make, hydrating and moisturizing the skin, and great for any part of your body, from face to toes. Gentle enough for most skin, and fun to make to give away as gifts, too! I much prefer making my own gifts to give away, vs. buying them, and these are especially purposeful since we love our shower and bath time!

I found that Calendula is not only amazing for the skin but also pretty to look at, but in a pinch you can feel free to use rose petals too. The oat is gluten free and acts as a nice exfoliant for the skin. All in all, a wonderful afternoon activity that will leave you with enough soap to last you for months!

Grapeseed oil or a neutral oil for silicone molds

Silicone molds (these would work)

16oz shaved/grated glycerin soap base (I got mine here)

¼  each organic calendula petals/flowers and rolled oats

8 drops Elemi Essential Oil

4 drops Palmarosa essential Oil

Grease your silicone molds with the oil. Grate your soap (or you can cut them super fine too, if you’re faster with a knife) and pour in heat-safe bowl, over a pan of simmering water (or double boiler, which is easier). Let the soap melt, and remove the heat. Add in the essential oils, and stir to prevent bubbles from forming. Arrange your herbs in the bottom of the molds. For these, I put a pinch of Calendula on the bottom of one, and a pinch of rolled oats in another) and pour the soap over them. Allow to cool and set for a few hours. Keep in a cool, dry place. For maximum freshness, use within 6 months. Enjoy!

This recipe is an adaptation of a recipe found in the book, Fresh And Pure, by Jules Aron.


Sundried Tomato Powder

One of the highlights of my stay at Living Light Culinary Institute included early morning help in the kitchen before classes started. Weary eyed, sleepy headed, chilly morning walks to school....but I absolutely loved it and considered it an honor, working in a raw vegan commercial kitchen ~ how many are there of its kind, I don't know, but probably very few. It was too much fun working early morning under excellent great raw vegan chefs and instructors.

Despite a minor Blendtec lid *snafu*, I did eventually learn how to make proper sundried tomato powder {just imagine putting on the lid wrong, turning blender on high, powder everywhere. I only have a Vitamix, so who knew?}.

You'll love this powder....it's called "Sundried" but really, the dehydrating of tomatoes brings out their "cooked taste" without losing any of the nutrients {and without really cooking them}. Sweet, earthy, dark, hearty, and an amazing addition to soups, sauces, even guacamole and crackers! Flavor, flavor, flavor is where it's at. And right about now, we have bumper crops of tomatoes from the heat of summer, perhaps too much to know what to do with. If you're making salsa or sauce, you can just take the peels, seeds, innards, any part of the tomato, pulse it up in the blender and pour them over dehydrator trays. In a few days, you'll have a crumbly dry heap that you can process again in the vitamix into a powder. Keep it in an airtight container, and you're good to go for quite a while! 

One note: size really matters when dehydrating tomatoes. I learned this the hard way, but you can't simply cut a plum tomato in half {even the little cherry guys} and dehydrate them. The outside might be dry, but the underside is often wet and warm which means you can harbor mold. Plus it just takes too long to dehydrate which further exacerbates the mold issue. A quick chop in the blender or food processor {so it looks more like chunky sauce} should do the trick. 

3 cups chopped tomatoes, skins, innards, seeds, etc. Pulse these in a food processor or blender so they don't have any big chunks.

Lay the contents over two dehydrator sheets lined with teflex sheets. Dehydrate at least 24 hours (or more) at 110 degrees. I often keep these in for two days ~ you just want them to be completely dry. Let them rest and cool for 15 minutes, then crumble off into a vitamix vessel. Pulverize and store in an airtight container! Enjoy. 

Organic tomatoes from our garden.

Organic tomatoes from our garden.

Dehydrated chunks of tomatoes, before processing into powder.

Dehydrated chunks of tomatoes, before processing into powder.

Sundried tomato powder.

Sundried tomato powder.

#GiftABook: How one book learned to travel

If you know me, you know I love to declutter, reorganize, and keep things tidy. I even have a declutter group on FB where I host 30-day challenges, have written a pantry declutter ebook and teach Decluttering Classes at our local Community College on the subject. I'm a self-proclaimed declutter queen! 

But if you also know me, you know I have a serious book addiction.

The more I talked about decluttering, the more I realized I had to confess to the elephant in the room, which was that I had difficulty releasing books. Shoes? No problem. Clothes? No problem. Furniture, knick knacks, anything else? NO problem.

But there's nothing like a book ~ they're amazing to hold, feel, read from, even the scent of the book, and the sound of the pages turning. I was and never will be into an electronic device that rids us of that tangible experience with a book. However, we have a tiny, just "perfect" home, and my library was growing. 

Worst part is that I was moving them around, all around the house, without a clear plan. Most of my books were culinary, so I'd use and reuse them again, that was no problem. But those that I didn't use were still taking up space. The other groups of books were business books, self-improvement books, spirituality books, books about finances, music, and personal performance. I would move them from this shelf to that shelf, organize them by color, forget I had some, re read others, and just start collecting books that were by the same author. Collections, as you know, are a trap. It's the idea of a collection that we're intrigued by, not the books themselves....and I found myself swimming in books! 

So as soon as I read a delicious, amazing, inspiring book, I wanted to share that with someone else. I started mailing books to friends who I thought would enjoy them. I'd only ask that they'd keep the gift moving, to someone else would could use the inspiration. And so #GiftABook was born. 

I wrote my name and date on the inside cover, to keep track of where the book has been and who it was gifted to. And I sent them out on an adventure. With three intentions: 

1. Someone else could enjoy the book, become inspired. 

2. They'd share that with someone else, hoping for the same. 

3. They'd release the book, welcoming in something new, or simply loving the new space it created.

If you'd like to join me on this journey, please do....and if you happen to take any photos of the book, or would like to share your experience, please use the hashtag so we can all connect. 

See you on the other side, and happy reading! 

Hemp Peppermint Patty Smoothie

IMG_7191.JPG

I'm pretty obsessed with chocolate (good chocolate, like cacao powder) and mint together. Especially for summer, when the garden is growing up beautiful stalks of spearmint and peppermint (you choose), and you pine for something cooling and refreshing, this hits the spot. Plus it has the secret added benefit of anti-inflammatory (and protein rich) hemp seeds, kale greens, and antioxidant-rich blueberries. It's easy and absolutely delicious. 

3 tablespoons shelled hemp seeds

10 oz water (around 1.5 cups)

3 heaping tsp raw cacao powder

One large handful kale

1/2 cup mint

1 and a half frozen bananas

1/2 cup blueberries

In a high-speed blender with a tamper (preferably), blend hemp and water to create "hemp milk". To this mixture, add in the remaining ingredients, blend well and serve with cacao nibs, unsweetened shredded coconut and pumpkin seeds. This is enough for one with leftovers throughout the day, or two pretty hefty servings. 

IMG_7190.JPG

Coconut Blueberry Love Bowl

There is just SOMETHING about bowls. It might be linked to my "mild" obsession with wooden boxes, shoes, bags, other things that hold other things...I think it's their nurturing aspect, of holding something, taking care of something, taking that something special with you... that I really just love. But bowls are in a field of their own ~ they are regal, majestic, beautiful, and so the food we put inside of them should also be majestic and beautiful.  And most of all, nurturing. 

"Love Bowls" are also something that we can all make that just look beautiful ~ and as long as you layer different colors of nutritive foods and play with your "art", play with your food, they pretty much create themselves and the delivery system is just two hands, holding a bowl, and noshing. I've even just thrown stuff together and didn't necessarily care how the food landed, and it's always beautiful. It doesn’t get better than that! I love it. 

For me, I really need to chew something in the morning, and it has to be high in protein and fiber and low-glycemic. Smoothies are great, but I bore easily with them ~ not so much the flavors {since those are endless} but more so for the texture - it's predominantly smooth and I wanted something that was more gritty, something that would make my jaw work and "wake me up". That's why bowls are just perfect....

This pretty much is my new favorite thing ~ blueberries are just the bomb, every which way, the coconut yoghurt and the protein power are both very filling, lightly sweet, and taste indulgent in the morning, and the crunch from chia, flax, coconut can't be beat! Mix it up any way you want, grab a big spoon and dig in!


The basic template for this love bowl is:

Bottom: could be coconut yoghurt, granola, etc.

Fruit: berries are my faves but you can add kiwi, oranges, etc.

A good fat/crunch: coconut, chia, flax, walnuts, etc


INGREDIENTS:

1/2 cup probiotic coconut yoghurt

1 tablespoon protein powder (I love Sunwarrior Classic Chocolate)

1/2 cup blueberries

1 tablespoon each: ground flax, chia, unsweetened shredded coconut

Sprinkle of walnuts, optional

Combine the coconut and powder together until it's mixed well. Just know, different protein powders differ in sweetness ~ I tried this with a whole scoop of protein powder (one whole serving) and it was just too sweet, so I added only 1 tablespoon powder instead, but you be the judge on how much you like. Place the yoghurt mixture in the bottom of the bowl and layer with the blueberries, flax, chia and coconut (and walnuts, if you're adding them). Enjoy! 


Probiotic Raw Vanilla Coconut Yoghurt

I love playing in the kitchen and infusing my food with natural, good for you probiotics, the way they happen in nature....like making sauerkraut and kim chi from scratch, and new favorite, this vanilla coconut yoghurt. In fact, research shows that probiotics found in kim chi and sauerkraut and other ferments create much more diverse colonies and symbiotic relationship between probiotics than those found in a capsule (which are fabricated in a lab). So much so that you end up saving money if you make your own, vs. buying a probiotic bottle of pills.  

I'm in love with these frozen packs of fresh raw coconut (see below), and I bought a whole case just for this purpose: making my own yoghurt. While it's expensive, I've experienced breaking open expensive coconuts from a store and finding out that they're either purple inside, don't have enough meat, aren't fresh, or the outside is sprayed with fermaldehyde. Gross! You've ended up wasting a lot of time and having to return the coconuts anyway. This one is a no brainer: you save so much time and hassle! Plus they're frozen so they last a long time, ready to use when you need them. 

Also, here's a really good reason for making your own yoghurt: When you buy store-bought yoghurt, many times it has stabilizers and preservatives, even the good kinds. This recipe has 4 ingredients, all of which you can pronounce, and it's oh so easy & fast to make:

1 package raw coconut meat, defrosted (I love this brand)

1 cup coconut water (I prefer this one, as it's in a glass; you can also buy them individually at any health food store)

2 tablespoons pure vanilla extract

1 teaspoon probiotic powder (I use this one, but you can also break open a few probiotic capsules and give it a go)

Blend all ingredients together in a high speed blender until smooth, using the tamper to move all everything in towards the vortex. It's best to leave this overnight on a counter (if your kitchen is cool, otherwise, it will turn sour fast), or in the fridge. This helps the bacteria to proliferate (multiply) and create a probiotic-rich food that's not only creamy, sweet and delicious, but so very good for your micro biome. I love adding organic strawberries and cacao nibs to it and make it a morning breakfast. Enjoy! 

"Love Yo Face" Serum

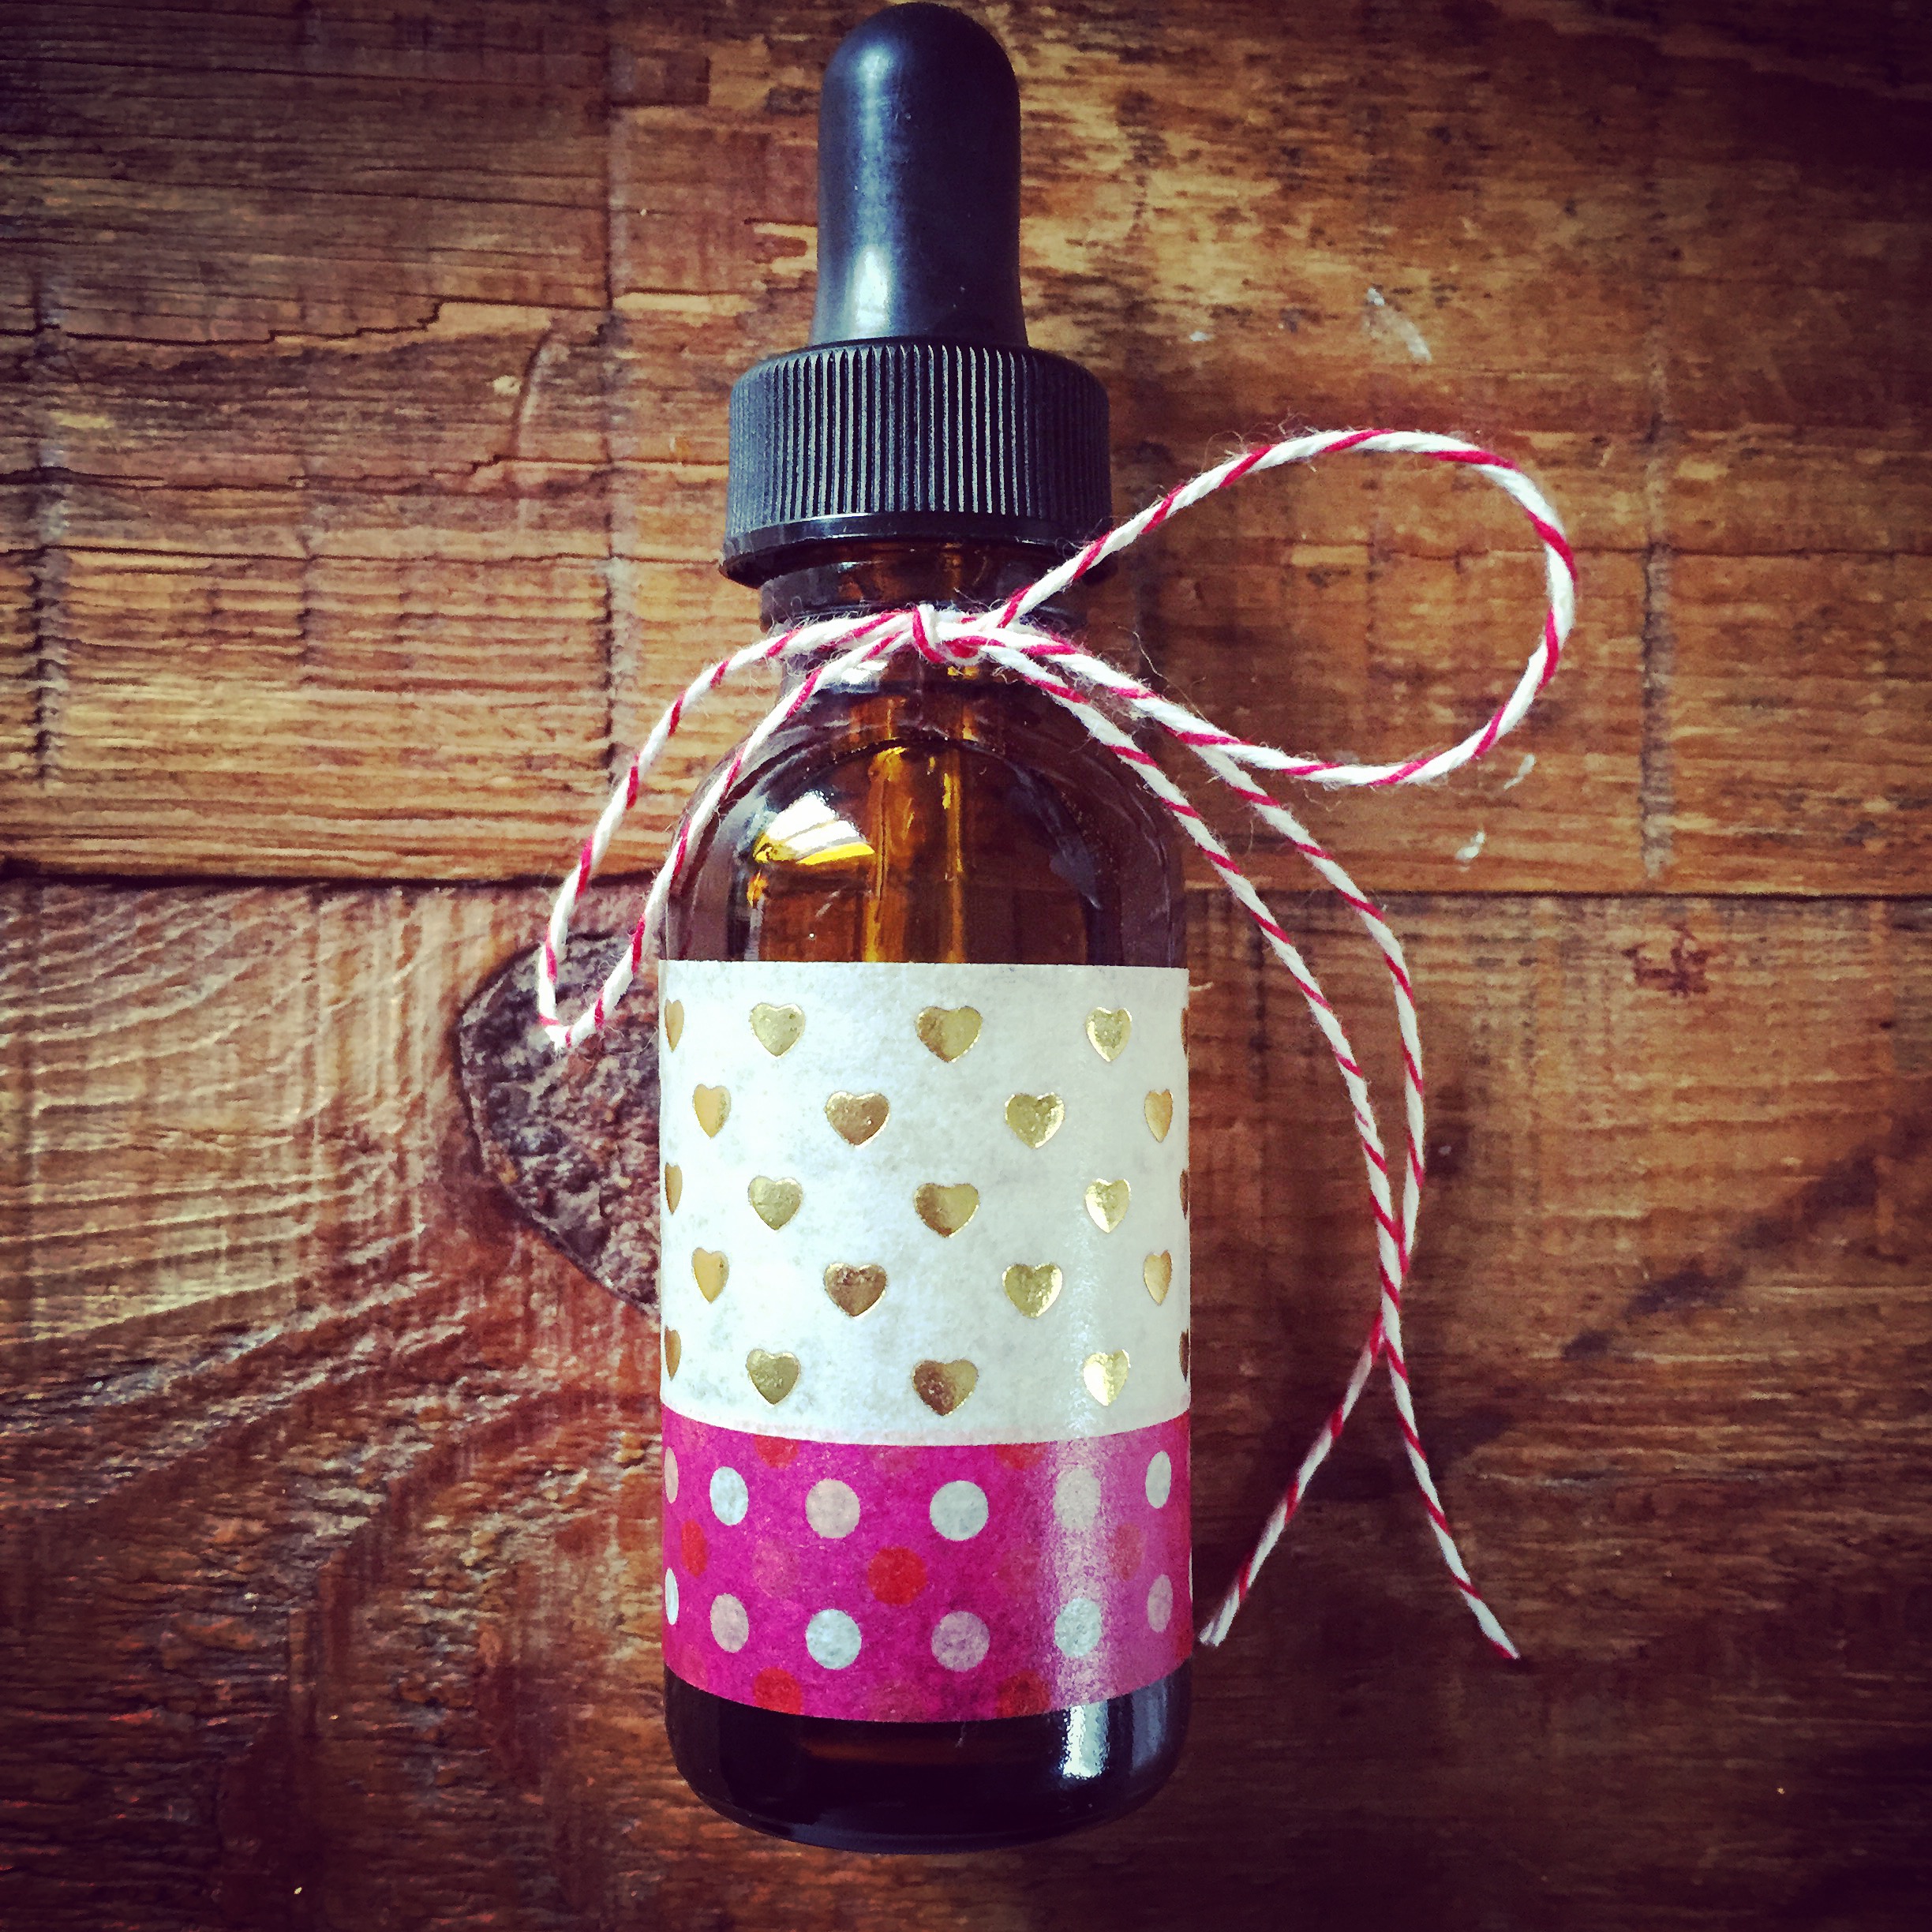
IMG_5685.JPG

Last year, I had a Make & Take with my fellow team members and we made a face serum to LIVE for ~ this year, my schedule got a bit busy, so I wasn't able to host another Make & Take but I DID want to share with you a similar recipe that might put a little Valentine's pep in your stop and help you LOVE YO FACE. 

Also, I should say, that title does not belong to me - huge props to my sweet friend Jess who thought of it and is pure genius. All royalties go to her, of course.

The recipe is very forgiving and fun, so be sure to play. Add a little more of this, less of that. You get the gist. Also, it goes without saying that all of these Essential Oils are the Young Living brand, and I stand behind them 100%! They're my favorite and my life has changed in incredible ways since using them. To find out more, check out my other website here to get the inside scoop! 

Here we go:

1 oz bottle of Argan Oil (or your preferred carrier oil like jojoba, grapeseed, reship, etc.) ~ make sure it has just a little bit of headspace (meaning, it's not completely full) to allow the displacement of the oils below....

3 drops Lavender Essential Oil

4 drops Frankincense Essential Oil

3 drops Manuka Essential Oil

2 drops Geranium Essential Oil

4 drops Copaiba Essential Oil

Add the drops to your bottle of Argan Oil and shake well. Please note, this oil shouldn't be rubbed into the skin, but rather pat - the application should be gentle. 

IMG_5687.JPG