Raw Carob Raspberry Brownies

Let's just be clear, there needs to be dessert in the house or I get cranky. Actually....scratch that. There needs to be CHOCOLATE in the house or I get cranky. But with insulin resistance (or on the mend from it!) there's not much dessert I can have....or so you'd think.

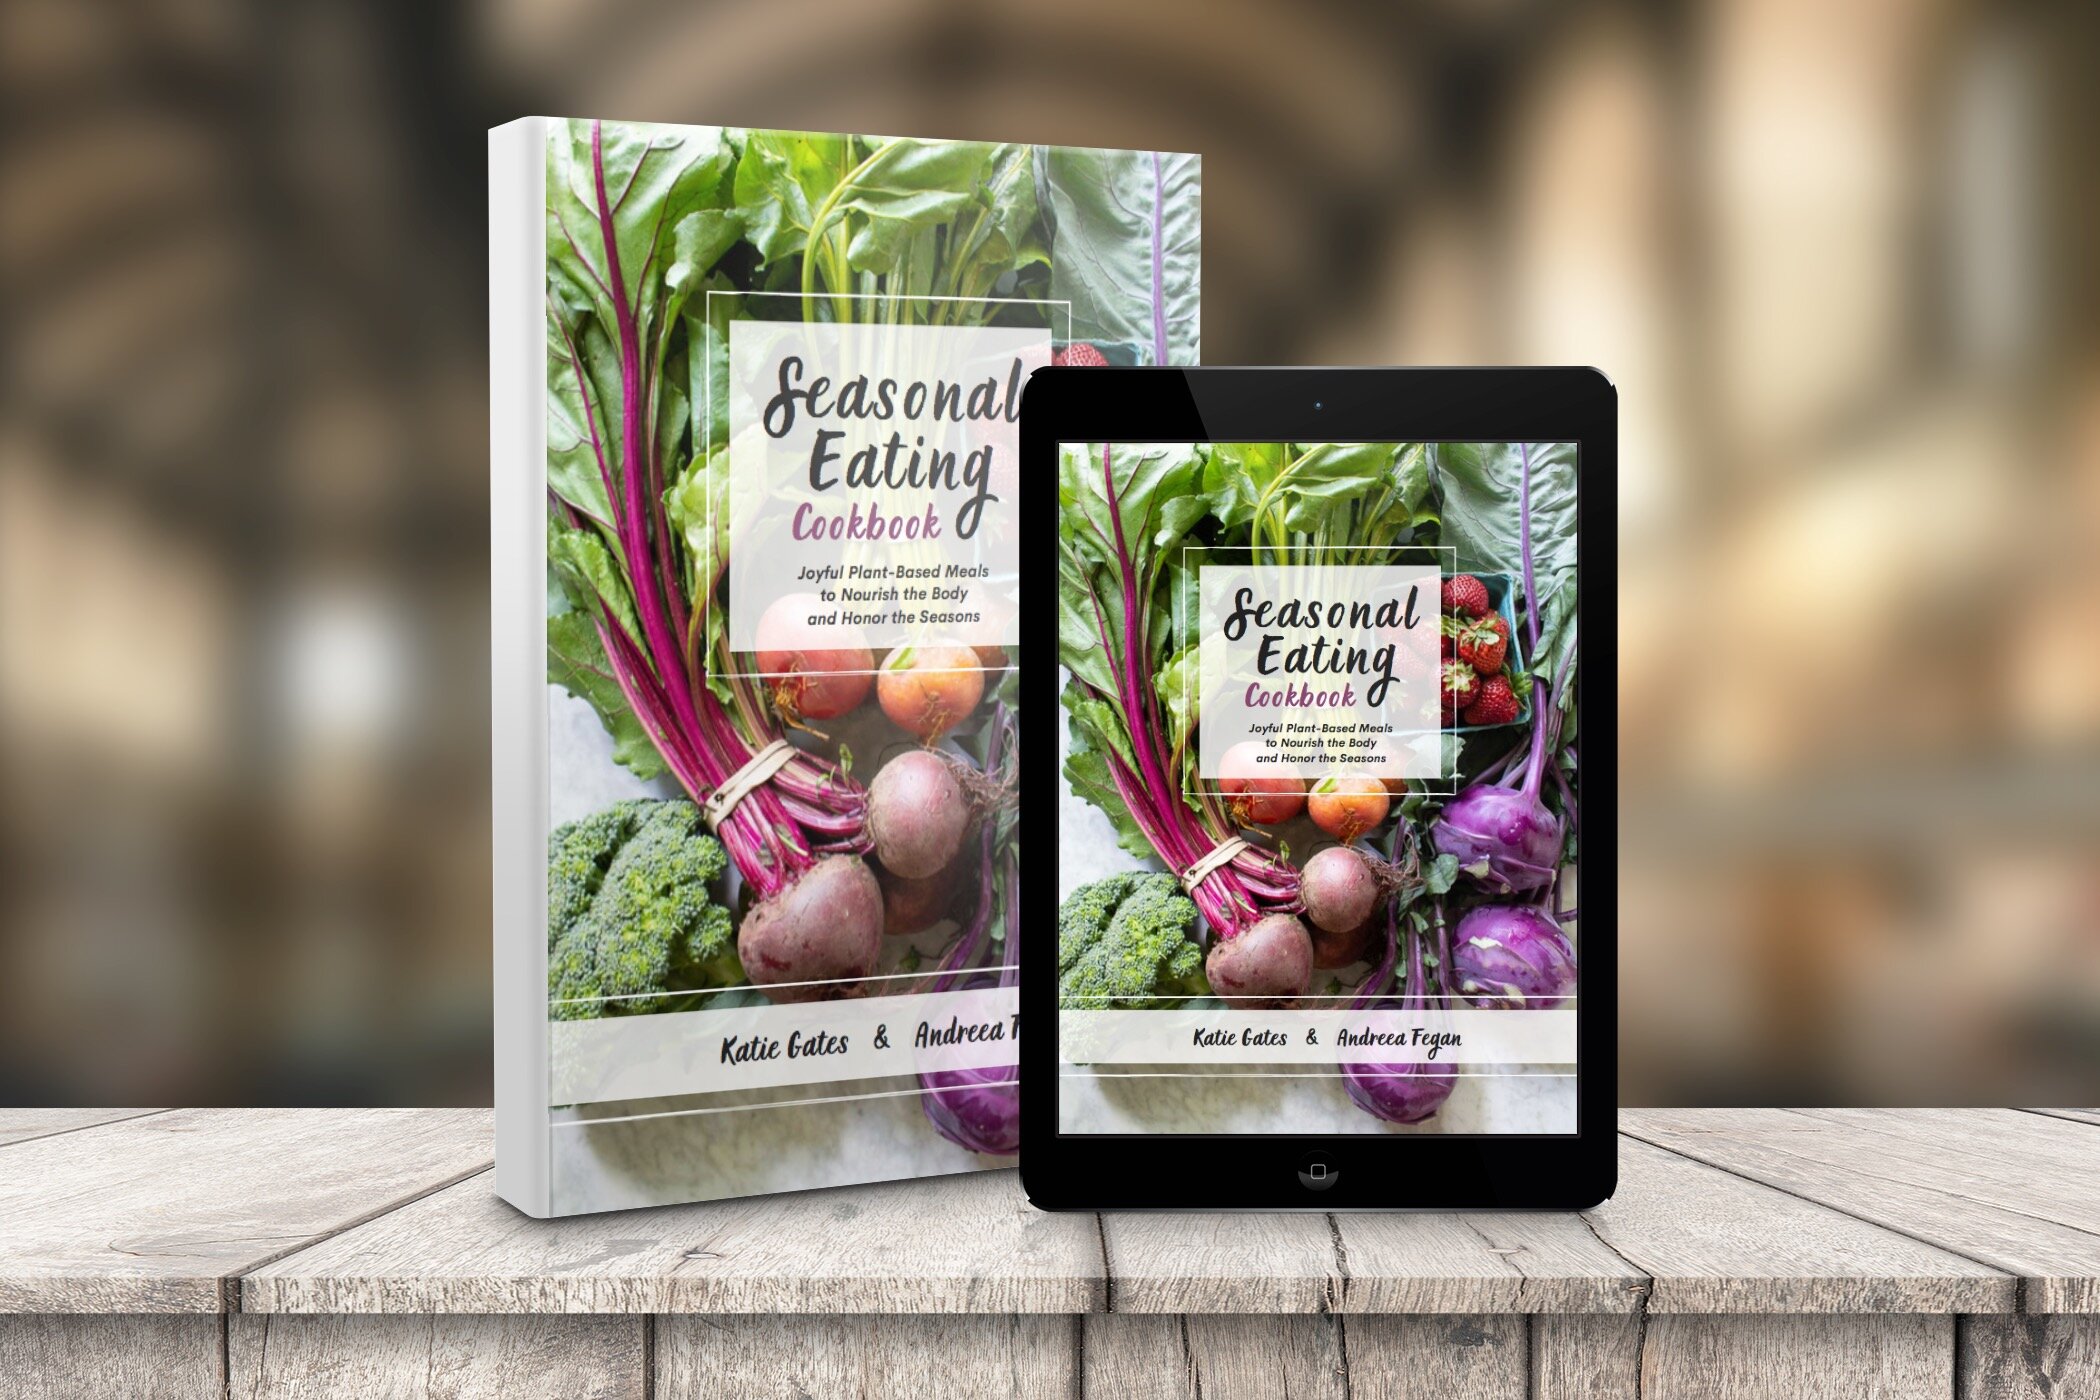
Lucky for you, I wrote a whole ebook (available here) on sweets that are low-glycemic with barely a drop of sugar in them (I can't say completely sugar free since I do use raspberries...but other than that, no dates, maple syrup, honey, sugar, raisins, none of that!) 

I've enjoyed raw brownies made with dates for a long time, topped with chocolate ganache (made with maple syrup) and raspberries...but I wanted to try something even better. Something you can eat without guilt!

Enter....The raw carob brownies...of your dreams. 

And yes, while carob doesn't necessarily make everyone's head turn or toes curl, this is actually a glorious marriage of dark beautiful chocolatey goodness. A blend you'd never suspect, but one that works perfectly.

Brownies:

3 cups walnuts

1/2 cup cacao powder

1 scoop sunwarrior protein powder, chocolate (optional)

pinch salt

1 tablespoon vanilla extract

2 dropper full of hazelnut or english toffee stevia

scant 1/4 cup water (or herbal coffee if you feel adventurous)

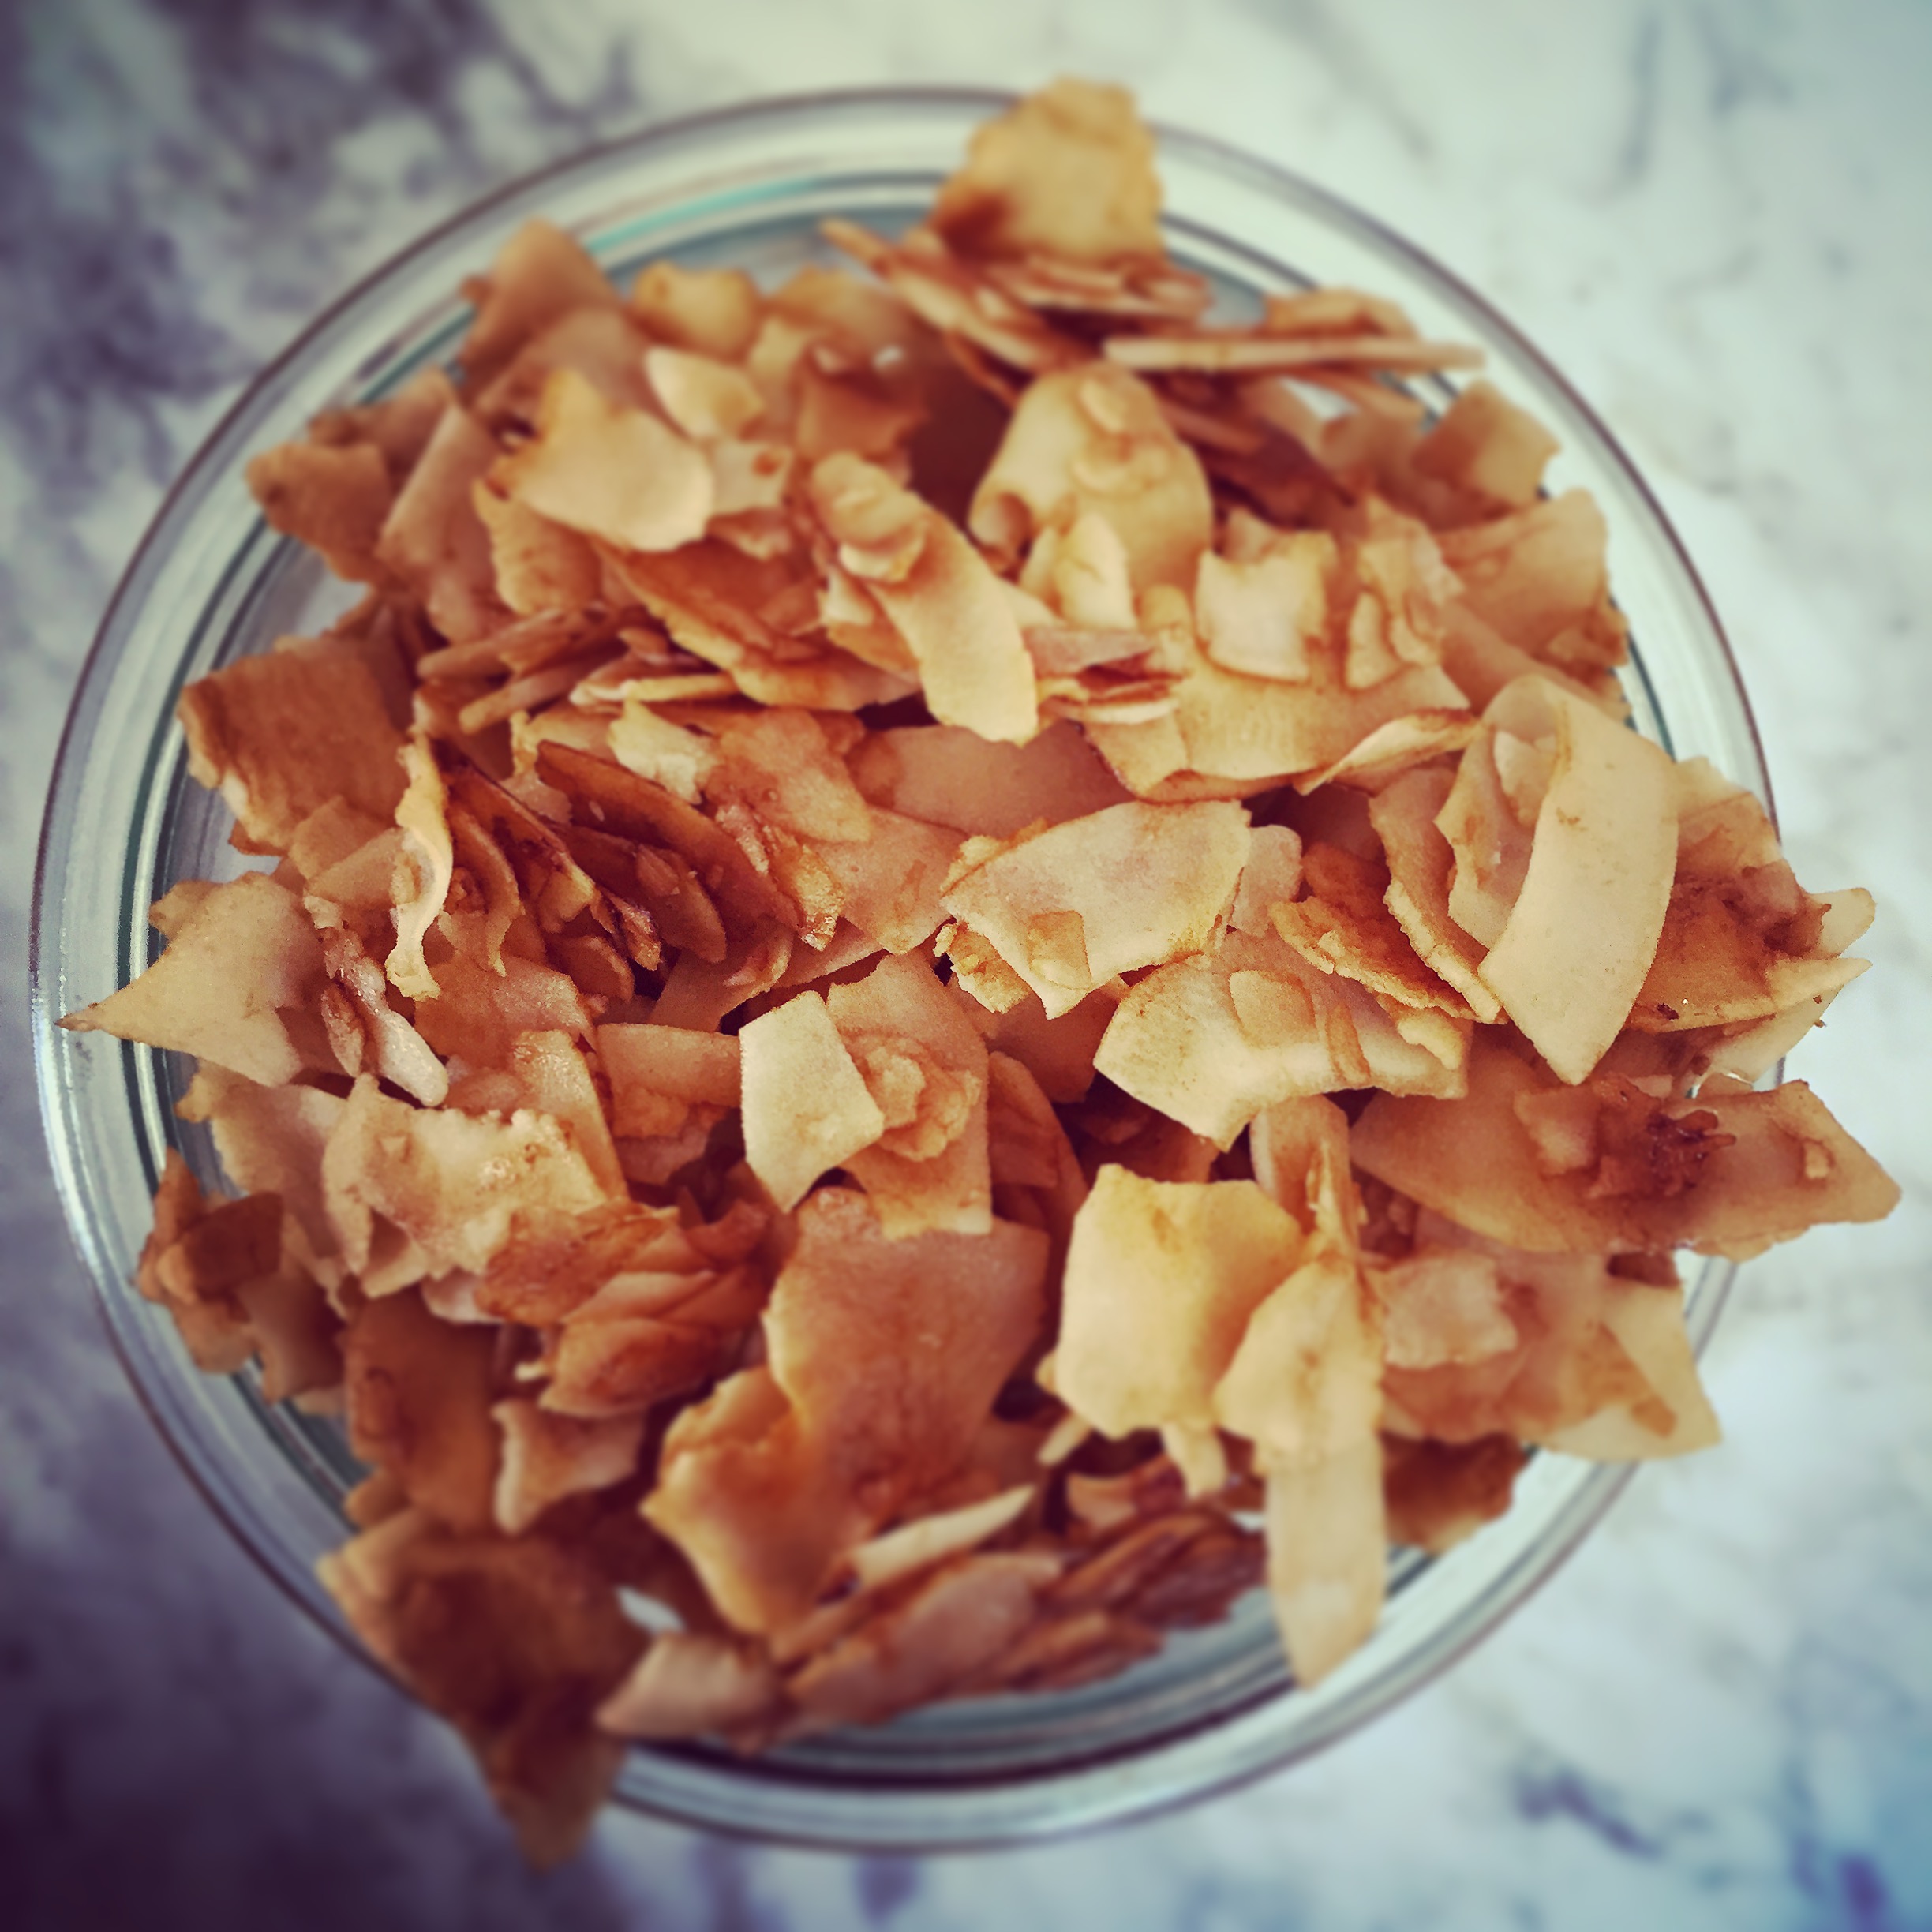
2 tablespoons unsweetened shredded coconut

Pour the coconut evenly on the bottom of an 8x8 brownie pan. Set aside.

Pulse walnuts in a food processor until they resemble rice. Add in the other ingredients and process until mixture starts to crumble into even smaller bits. As machine is running, start to pour in the water little by little (you may not need all of it) until mixture starts to stick when pressed together between your fingers. Taste for sweetness and adjust with stevia. Pour this mixture in the brownie pan and press down to form a smooth surface. 

Ganache: 

1/3 cup coconut oil, melted

1/4 cup cacao butter, melted

pinch salt

1/2 cup carob powder

2 dropper fulls hazelnut or english toffee stevia

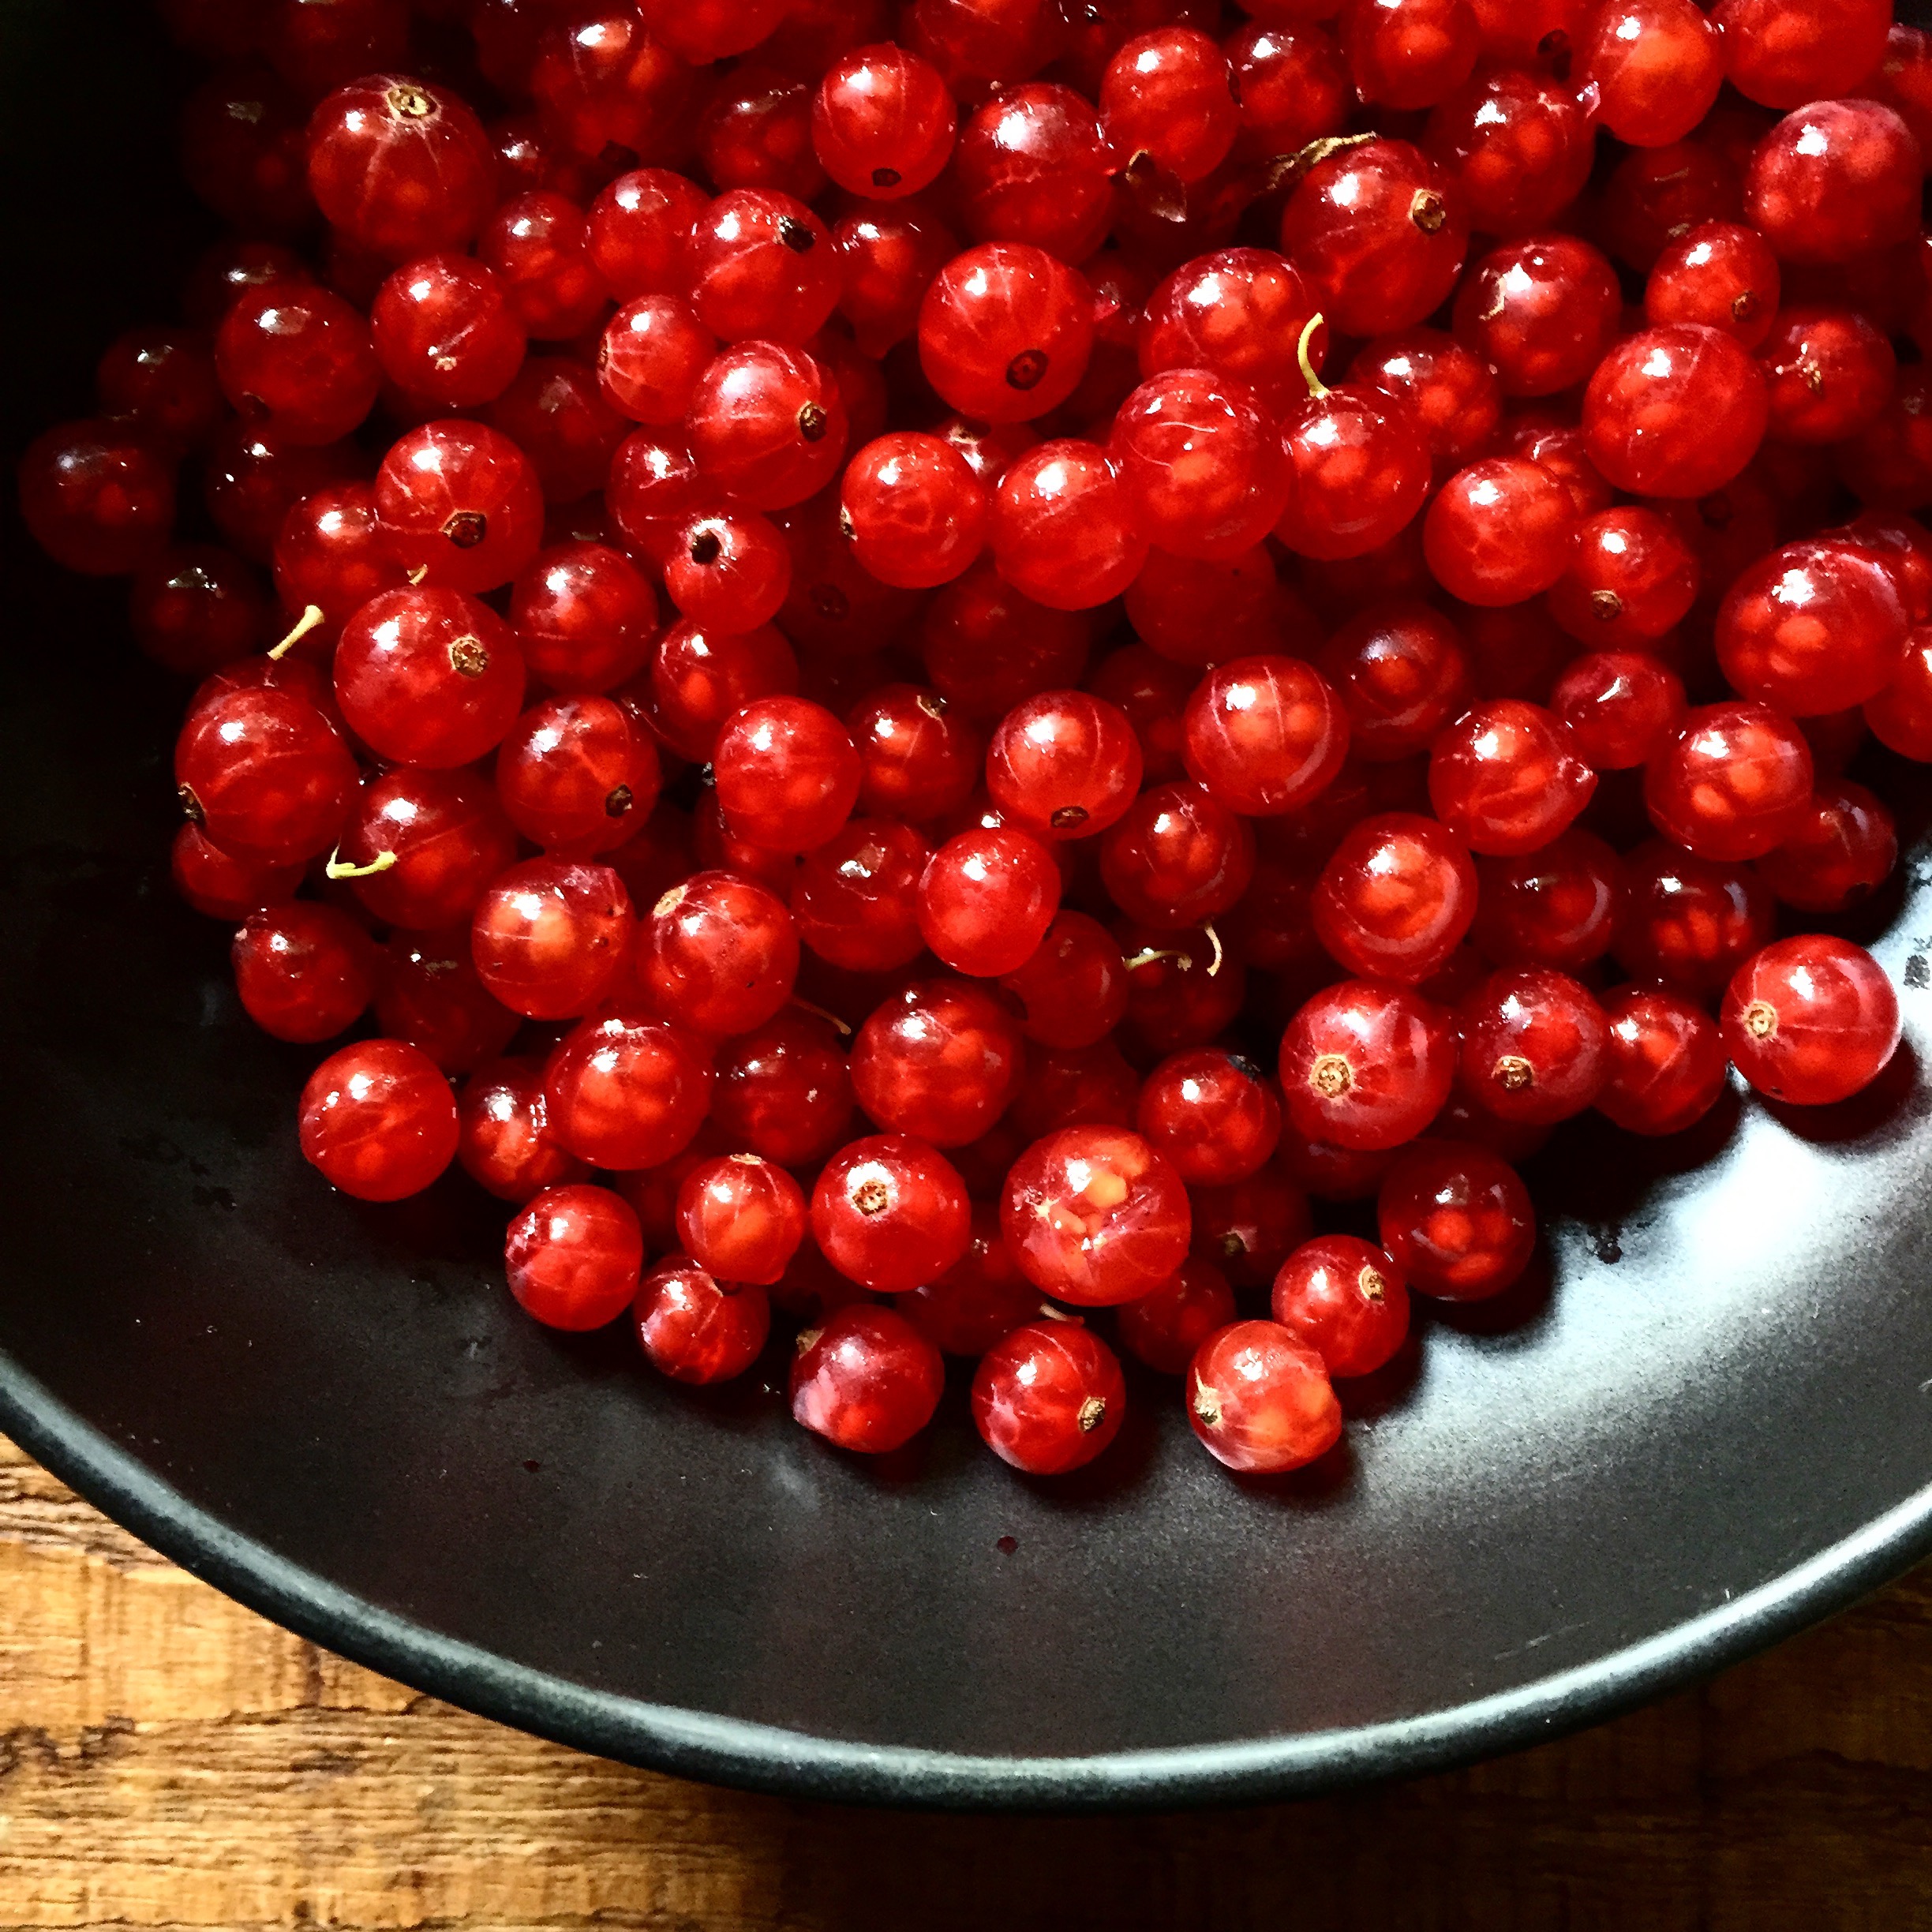
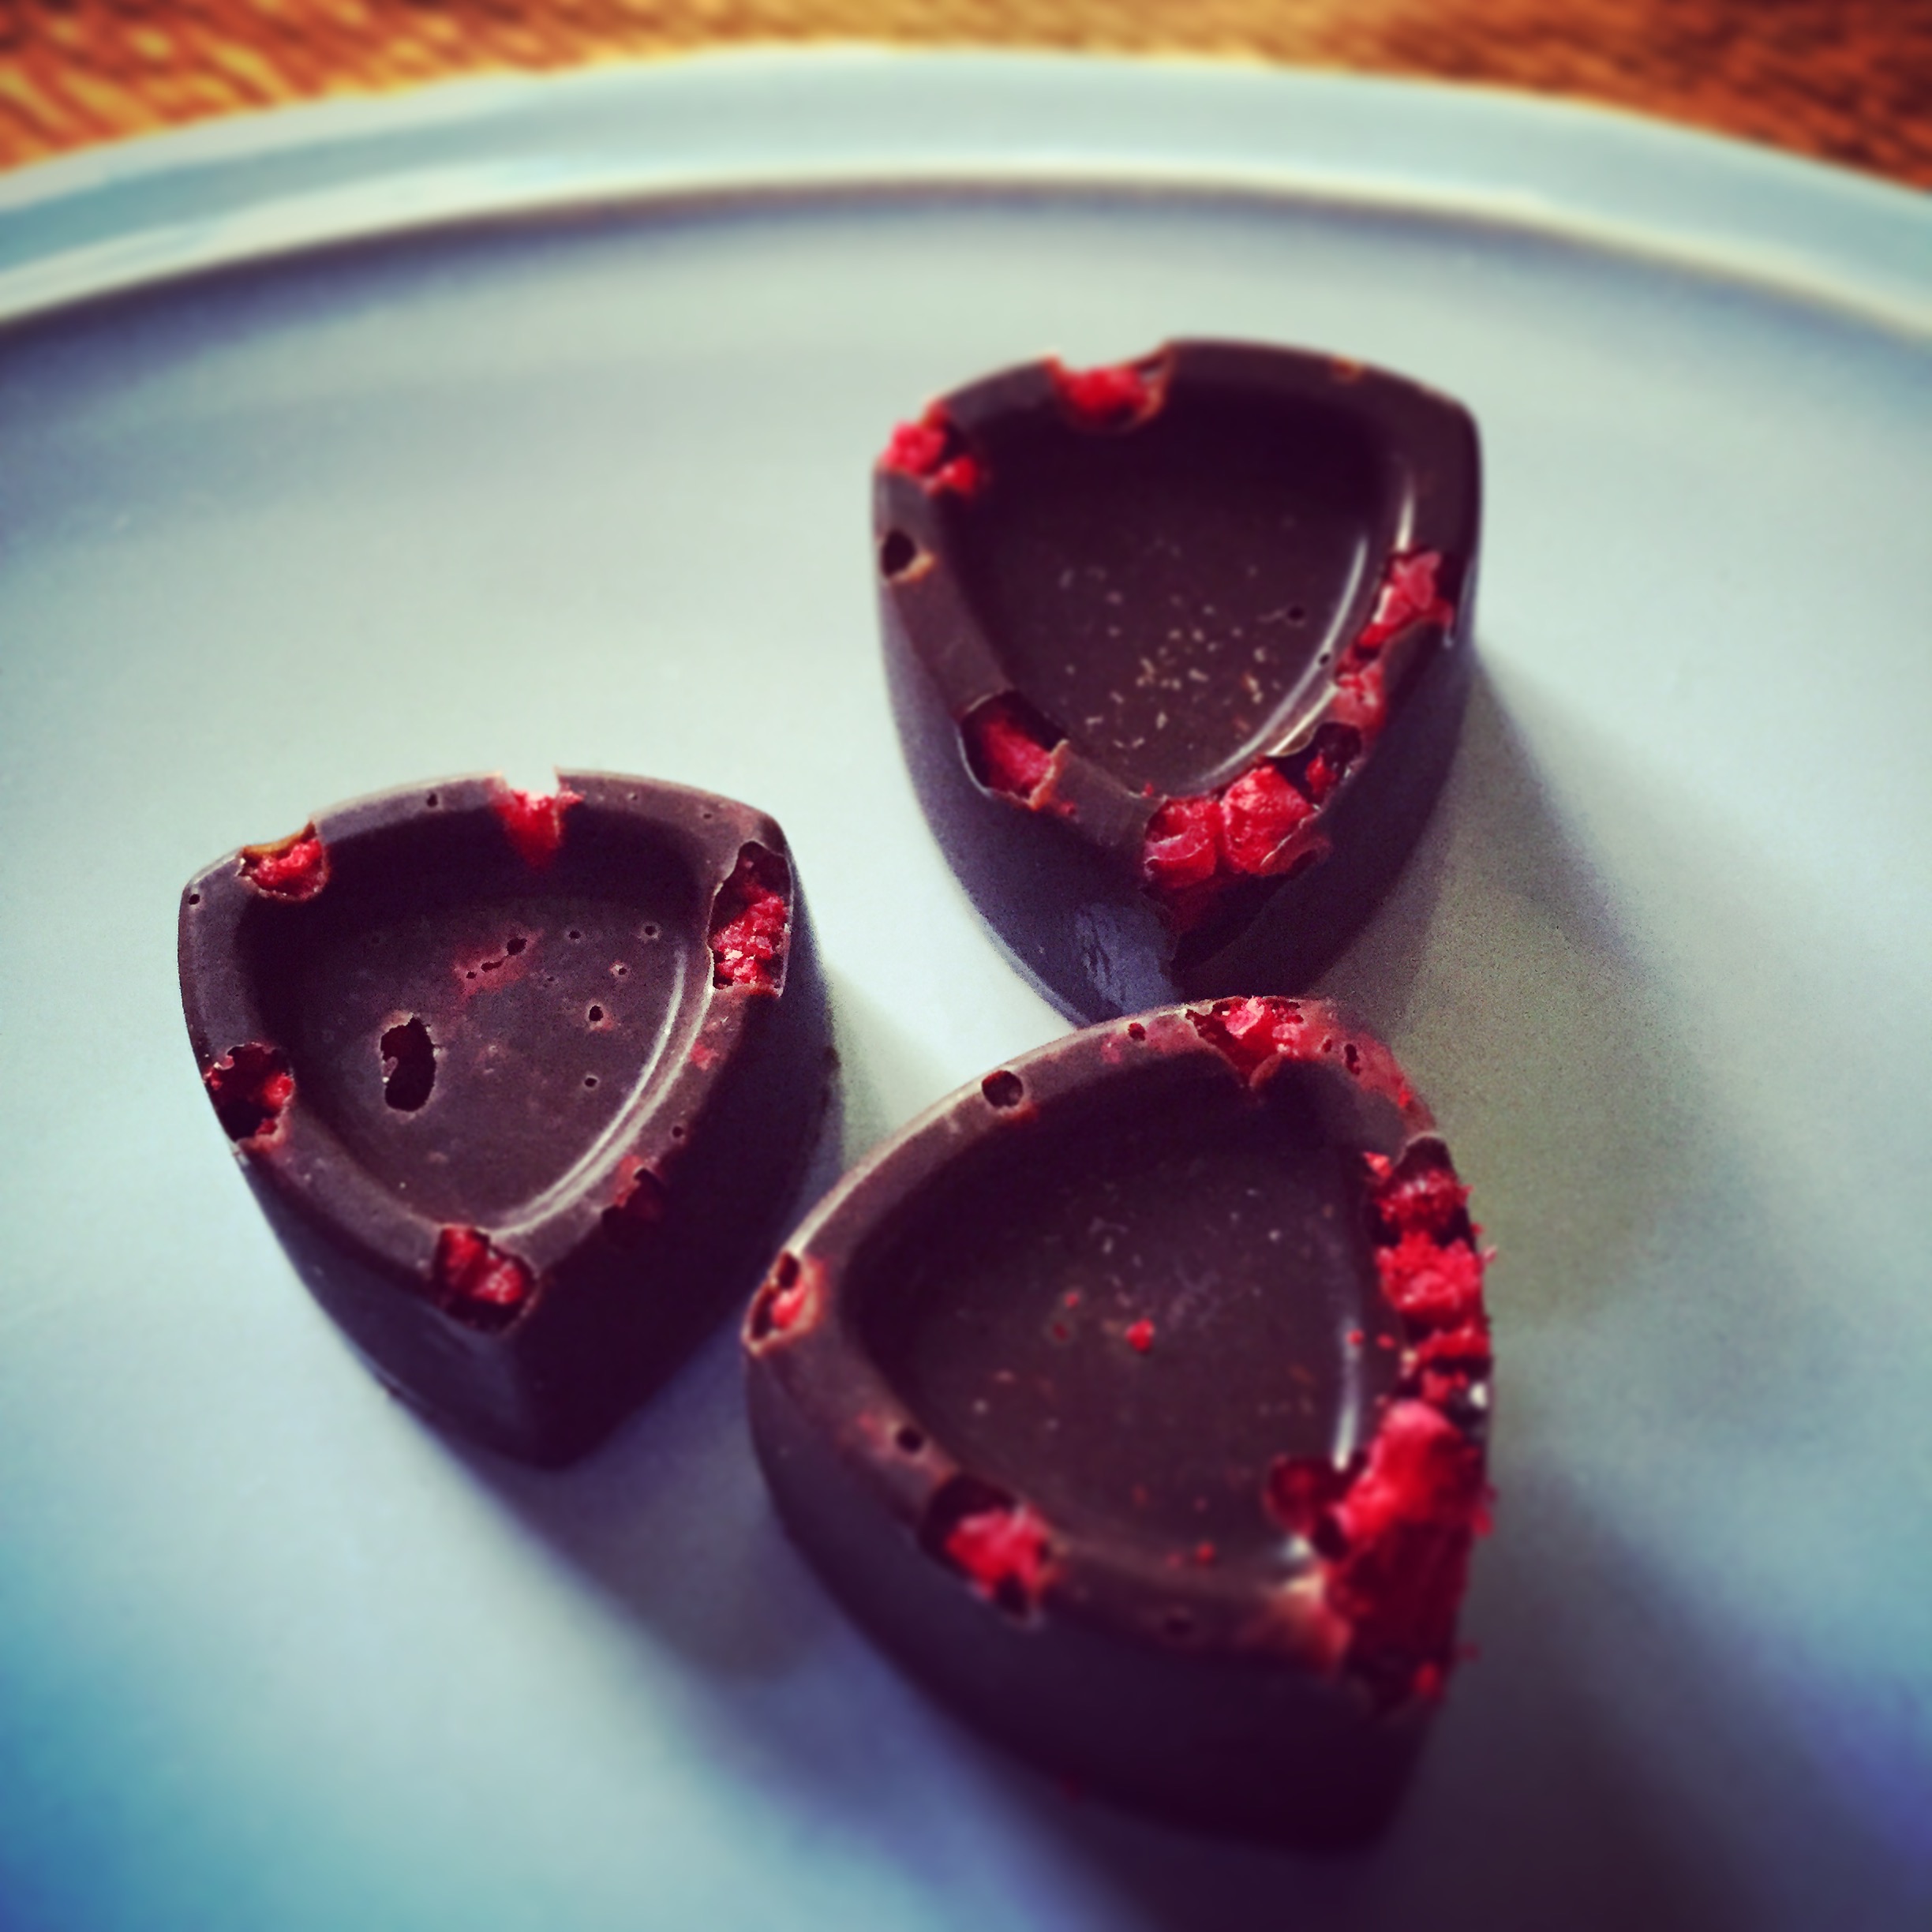
Decorate: freeze dried raspberries and 1 tablespoon unsweetened shredded coconut 

Blend ingredients together in a high performance blender until smooth. You might add a few tablespoons of water if you need to get it running, but try not to if at all possible (it sort of separates)..... The ganache might look lumpy...that's ok. It's not going to be super smooth and that's actually a desired effect (more surface area means you get taste all of that ganache goodness!)

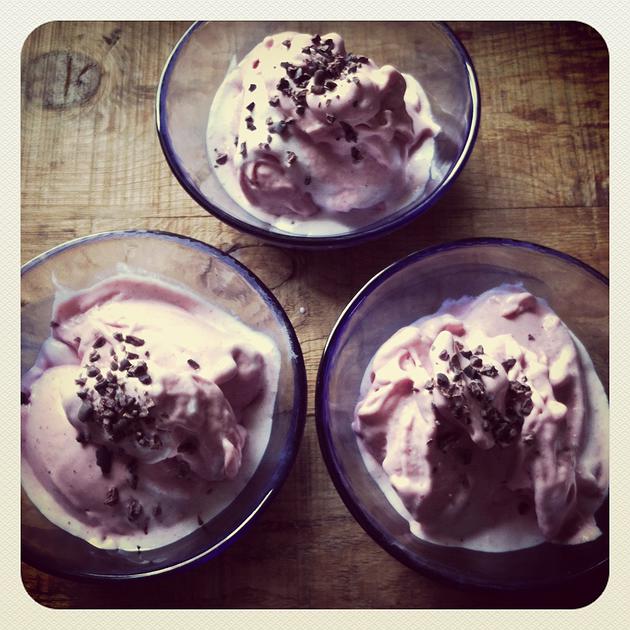
Pour ganache over brownies, and decorate with freeze dried raspberries and the remaining coconut. Refrigerate at least 2 hours. Cut one out and enjoy it...eventually you'll want to tear them out of the pan like an animal, which is ok too (see the photos I enclosed). 


Moringa Green Apple Smoothie Bowl

You wouldn't think all of these flavors go well together but they are like a coconut apple pie in your mouth and so so so good. I've offered this more as a template than as a stress test: if you can't find these superfoods, do not fret. Use what you have on hand! Spinach instead of kale, skip the tea and make your own chammomile or even mint! Get creative. If you don't know about sunwarrior, I prefer this protein powder since it's really clean and lean and is based on raw, sprouted brown rice protein with nothing fake. You can also use the original which is just: raw, sprouted, fermented, bio-available clean brown rice protein. That's it! How can you go wrong? 

Also, I should say, I typically use 2 cups of water, but I've posted 1.5 if you're looking for more of a smoothie feel. I like it as a morning soup, though, but go with what oyu like. For me, I like to slurp it up with a big spoon!

I use only green powders here: 

1. moringa (this is a beautiful new superfood on the market that is touted to be pretty much everything for eveyrone - I don't know if that's true but I've looked into it and it has great fiber, chlorophyll, protein and fats and even the stem, leaves and pods are used in many applications). 

2. matcha (which is essentiall green tea powder, a metabolism booster, but I go easy on the stuff especially if you are sensitive to caffeine)

3. spirulina (a seaweed which is a great detoxifier, great in protein, but the taste can be quite a challenge and aquired taste, so I feel that 1 tsp is just the right amount to sneak it in)

IF you have none of the above, feel free to just use 3 tsp of your favorite green powder (green vibrance is one of my favorites). 

This smoothie is packed with protein, fiber, chlorophyl, is low-glycemic and a great way to start the day. Dig in! Happy St. Patrick's by the way, and eat your greens!


1.5 cups water, (optional: brewed wtih "Get Burning" tea, cooled - this gives it a nice apple pie flavor) or brew your own tea of choice, then cool it.

1 tsp each: moringa, matcha, spirulina

1 handful kale

1 cap of Sunwarrior Liquid Light (optional)

1 scoop Sunwarrior Classic Vanilla Protein

To garnish: coconut, cacao nibs and green apple

Blend the first 5 ingredients together, taste for sweetness and perhaps add a few stevia drops if not sweet enough. Pour into bowl and garnish with chopped green apple, unsweetened coconut and cacao nibs. 


A December Hygge Challenge

IMG_4784.JPG

What in the world is Hygge? And what's a December Hygge challenge?

Before we start, I have to give you a little back story. 

One thing you may not know about me is that I'm a "get it done" type of person. Not quite Type A, but quite possibly VERY close, although I do my best to keep calm and smile and keep my internal environment joyful and relaxed...but I thrive in my work. I love calm, but I love my work. And I work all day. All day, every day, 7 days a week. Yep, I work 7 days a week, and when it's a balanced 7 days, I love what I do. 

I had an oils class last night and I was talking to two dear friends about the concept of Hygge and it reminded me how much, despite my type work ethic, how much a huge part of me enjoys cozy atmospheres, tea, slowing down, lights, and blankets. That's Hygge. It's a Danish concept, a movement and a lifestyle, really, that cherishes slowing down, cozy moments, and togetherness. I have read a handful of books on the concept and it resonates with the deepest part of me, because at the center of everything I do ~ whether it's sleep, food, oils, yoga, having a balanced life ~ is SELF CARE. And Hygge can only reside when we make self-care a priority. 

SO what better time to do this than in December? My busiest month. Perhaps this is more a reminder for me, but I'd like to have you hop on my journey.

Every day I will be posting elements of Hygge on my Instagram and Facebook, and I'd like you to do the same, if you can. If you can't document it, that's fine ~ just do it. You don't have to take a picture of every tea cup. Or every blanket you throw on. You just have to promise me that this month, the month of rush and "Do", you promise me that you'll take your own health and make it #1.

You'll breathe deeply at the parties you attend.

You'll enjoy the baking if you do that, and put on some sweet lighting and good music.

Before you pass out in bed, you'll cuddle with your spouse.

When your dog wants a nuzzle, you'll put your laptop aside and give in.

You'll diffuser some lovely oils with cinnamon and orange. 

You'll have a cup of tea whenever possible.

Most of all, you'll spend time in nature, and look out your window and daydream.

And you'll make these as important as everything else.

Because you don't have your health, we don't have you.

That's all I ask. 

We start December 1st, are you in? 


HERE ARE THE RULES OF THE CHALLENGE: 

1. Follow Little Bites of Joy on Instagram.

2. Follow Little Bites of Joy on FB. 

3. If you do post about Hygge, hashtag #LittleBitesOfJoy, and give credit to this challenge

At the end of the month, the three people who have done the above, and have the most posts and most creative content will receive a little GIFT in the mail from me! 

Wishing you all a beautiful month of Hygge. 

See you in a few days with a warm cup,

Andreea

IMG_4787.JPG

October is "Salad A Day" Month

We had so much fun last October 2015 doing this all together, that we're doing it again! 

October is "Salad A Day" month! Challenge starts on Mon, Oct 3rd and runs through Monday, October 31st!

Ok, I pretty much made that title up. The truth is that I think every month should be "salad a day" month, and October is coming up, and what better way to start? Fall is the perfect time to begin a new habit and invest in some much-needed self care! Summer tends to be all over the place with parties, vacations, places to go, people to see...Fall offers us the opportunity to fall into a new and possibly life-changing routine! And a salad a day will be one of the easiest habits to implement with some of the greatest rewards.  

Greens are at the top of the nutritional food pyramid, and sadly most of us don't get enough ~ kale, collards, romaine, arugula, spinach, even herbs like parsley, cilantro. The darker the green, the better for us and more cancer-fighting phytonutrients. In fact, the more chlorophyl, phytonutrients, fiber and veggie-based vitamins we can get, we can expect better elimination, improved skin, more natural energy, calmer nervous systems, and by default, a slimming waistline. You may even experience a better attitude, better body odor {yes! chlorophyl acts like an internal deodorant}, better sleep, and just overall rockstar status! So who's in?  

But we all know that salads can be just, meh. It really takes a fun add-ins, dressings, textures, colors, and a variety of healthy veggies to doctor them up. If you're interested in new recipes, please consider purchasing our latest Salad Ebook, volume 1! It's 14 recipes to ignite your love for salads (and it's on sale here)!

So what are the guidelines of this challenge?

1. Make a salad every day and shout for joy when you're eating it. Well, internally. Your cells are doing just that. If you'd like some extra credit, include a green smoothie {greens and fruit} or even a blended soup {take those veggies and greens and blend them up with spices, garlic and a little avocado ~ yum!}. 
2. Visit & LIKE our Little Bites of Joy FB Page which will act as a platform for sharing tips, salads, dressings, photos, post questions, and start a dialogue with those working in this challenge together!  
3. Take inventory: collect data on weight, attitude, skin, sleep, overall mood, relationships, etc. At the end of the month, mark down how things have improved {since they will!}, and find ways on what has worked in case you'd like to continue. 
4. Inspire those around you to take on this healthy habit too {after they see how fabulous you look!}

And here are some tips for rocking this challenge:

1. As many colors as possible: a green salad is great, but add in some orange carrots, red or yellow peppers, green broccoli, even blueberries or white cabbage. Go crazy. It's ok, nobody's watching.

2. Alternate your greens: you're not getting AS much nutrition as you could be getting if you're having romaine day after day after day. Switch it up ~ spinach, kale, collards, arugula, red leaf, green leaf, baby lettuces, micro-greens & sprouts, escarole, the sky is the limit! Maybe buy three types, eat those throughout the week, then buy another three types and rotate.

3. Include a good fat, but not too much: you can easily add on olive oil, olives, avocado, nuts and seeds, and dressing...but basically you've got a "fat-fest". Many of our vitamins are fat soluble, which means we should be eating our greens with some kind of fat to fully absorb the nutrients, but try to stick to no more than two fats per salad. Love olives and avocado? Then make a no-oil dressing {there are many!} That sort of thing. 

4. Chew, chew, chew. Digestion starts in the mouth, so if you have some digestive issues, perhaps eat in a quiet space {without your laptop or phone} and take time to chew each bite really well. And when you don't feel like chewing or don't have the time, you can even dump your salad into a vitamix and make a blended soup. It's actually ridiculously out of this world delicious and so much more fun when you don't have as much time to sit down to a salad. I've done it and sometimes you can too.  

5. Be prepared: You may want to think about creating your own mini-salad bar. One half hour on a sunday will set you up for the whole week if you just take a long lasagna-shaped pyrex pan and create little sections of cut up peppers, cucumbers, broccoli, etc. And serve yourself when the time comes and create a hassle-free habit to help yourself out when it comes time to eat. 

That's it! You ready to dig in? Here are some pics to feast your eyes on and enjoy the journey! We officially start Monday, October 3rd, 2015, after we all buy some weekend groceries. So keep the pictures coming on social media and reach out with any questions!

Kraut, olives, sprouts, avocado, peppers, onion, no dressing {just mash it all up!}

Kraut, olives, sprouts, avocado, peppers, onion, no dressing {just mash it all up!}

Romaine, tomatoes, cucumbers and dijon {recipe coming up in our next class!}

Romaine, tomatoes, cucumbers and dijon {recipe coming up in our next class!}

Carrots, heirloom tomatoes, romaine, seasoned sunflower seeds. 

Carrots, heirloom tomatoes, romaine, seasoned sunflower seeds. 

Raw vegan Taco salad with chipotle salsa fresca. Find the recipe HERE!

Raw vegan Taco salad with chipotle salsa fresca. Find the recipe HERE!

Chopped salad with pizza crackers and caesar dressing. 

Chopped salad with pizza crackers and caesar dressing. 

OOLA for Women, Book Review

The following is a review, based on my own personal experience with the book "Oola For Women". I hope you enjoy!

My first experience with OOLA was about a year ago when I read the first and original OOLA book (found here) ~ it blew me away, honestly, and spoke to me in so many familiar ways. I've always believed in living a balanced life, but nobody put it in such easy, simple to understand steps than the OOLA guys, Dave Braun and Troy Amdahl..... I knew I was hooked.....I quickly set to understand more deeply the areas of my life that I was neglecting, and how I can awaken them. 

This was right up my alley, especially since so much of my life is devoted to self-improvement...it's something I'm working on daily. How to be kinder, how to understand better, listen more, shut up more, or speak my truth...be a better friend, mother, spouse, daughter, sister. How to find ways to have a bigger, more positive impact in my work with others. The OOLA book was life-changing, from this perspective, since it was all in one place, ready for me to follow along and make the improvements I was looking for...

IMG_3658.JPG

The OOLA guys partnered with Young Living to create the Infuse 7 oils kit, which contains an oil for all 7 areas of our OOLA life: Fitness, Finance, Family, Field, Faith, Friends and Fun. The brain has always fascinated me, and I love how I can anchor a feeling or emotion with a scent ~ so these oils were a brilliant addition to my collection. Every time I meditated or worked on my "faith", for example, I'd use my "faith" oil aromatically and anchor that feeling into my memory and emotions. It was such a helpful tool for me to support me in my own personal work to bring balance back into my life. These tools were life-changing. 

IMG_3656.JPG

Then came OOLA for women - I didn't think it could get any better, but it did! 

IMG_2168.JPG

I found myself sitting on the couch with a cup of tea, using these incredible oils, spending my "Miracle Morning" reading this book, and I loved every minute of it....not only did it cement the idea of finding balance in life and how critical that is, but I loved reading and learning about all the women featured in the book....their triumphs, their struggles, how they overcame aspects of their lives that seemed unsurmountable...I was cheering them on in the early hours of the morning when I carved out my reading time, my learning time, my growing time....I was there with them, every step of the way, and it inspired me to grow right along with them. The book reminded me that I had the power to overcome the challenges of my life, find balance, find joy, find peace with the past and find faith in the future, and find my OOLA life..... and it was ALL up to me. 

The book is divided into 5 sections ~ they make it effortless to flow through each section, and adopting tips and steps to finding your balance, and finding your own OOLA life. 

Section 1 introduces you to what Oola is - basically living in a state of awesomeness.

Section 2 goes through the 7 F's of Oola - Fitness, Finance, Family, Field, Faith, Friends and Fun.

Section 3 talks about Oolablockers that keep us from living that OOLA life, and reaching our dreams: fear, guilt, anger, self-sabotage, laziness, envy, and focus.

Section 4 goes through what they call the Oolaccelerators ~ those aspects that propel us closer to the OOLA life we desire, such as  gratitude, love, discipline, integrity, passion, humility and wisdom.

Section 5 tells all about the Oolawheel, Oolaplan and Oolapath ~ tools to help us unlock our OOLA life. 

I can't say enough about this book. I think everyone needs it....and if you think you DON'T need it, read it and you'll see how much you do! In fact, if any of you are searching for growth, balance, are curious, or just want to make your life infinitely better and happier, you'll find here.....

You can find it at: 

Barnes & Noble

Amazon

Peace, love, and my hope that you dream big and find your OOLA life,

Andreea

ps. If you are interested in the Infused Collection oils, please reach out to me...they've been such an important tool in helping me grow and live my OOLA life, every day. You can find out more by clicking here and searching "Infused". 

Currant & Tangerine Popsicles

Original post written: 2014

Um, there are no words to describe…I can’t even.

I had the best time this past spring taking an Ayurvedic Cooking course at the Natural Epicurean, and I’ve been implementing what I’ve learned about spices and flavor profiles into my current raw “uncooking”. This is one of those recipes that is so flipping good, there are no words. It’s amazing what happens (whether cooked or uncooked) when you combine whole ingredients with aromatic Indian spices. Flavors bloom.

This blog is pretty short since, well, I’m sitting here eating this gorgeous popsicle trying to come close to what it tastes like (and I have to say, I'm rather distracted), but I think you have to try it to believe me. If you can imagine creamy tangerine sorbet with a hint of anise and cinnamon, then you’re close, but not quite there. A pinch of cardamom for floral and spicy aroma, and tropical coconut for sweetness and freshness. Combined into one, this was an experiment, but one that I know I will repeat many times this summer. 

This is currant season, if you haven’t seen them yet! They come in beautiful reds, blacks and whites, although I used the reds for this recipe. When currants come into season, you have to take full advantage, leap high into the ground with glee, and get as many as you can. They are delicious, eaten raw, like candy, but in this case, we decided to take them over the top. To boot, these are sugar free, low-glycemic, so if you are struggling with insulin resistance, feel free to make these and consider them a delicious treat without the worry.  

It depends on how big your popsicle molds are, but for us, this recipe made about 4. Sad, since I already want more.

About 2 cups currants, blended, strained to leave you about ¾ cup liquid (Discard pulp)

1 cup canned coconut milk (include as much of the solid fat as you can, then top the rest with the remaining coconut liquid)

¼ tsp each: anise, cinnamon, cardamom powders

2 droppers full of stevia

Pinch salt

3 drops Young-Living brand Tangerine Vitality essential oil** 


**This recipe uses only Young Living brand Tangerine Vitality essential oils. Please do not ingest any other oils.  If you don't have this oil, please reach out (I'm happy to answer any questions) or just use 1 tablespoon organic tangerine/orange zest. 


Combine all ingredients in a blender until smooth, and pour out into molds. Freeze over night. Enjoy!

BLT Zoodle Salad

This is a super simplified BLT, in all of its glory, with all the nutritive qualities you'd want and none of the bad stuff! We've got coconut bacon, fresh ripe tomatoes, and the spiralized zucchini stands in for the lettuce. Super easy to put together, incredibly tasty and filling. Just make sure you have enough coconut bacon on hand, as you'll want to make this again and again!

1 zucchini, spiralized

1 tomato, chopped

1/4 cup sliced red onions

drizzle of olive oil

drizzle of raw apple cider vinegar

sea salt and crushed black pepper to taste

2 tablespoons coconut bacon (recipe found here)

Combine zucchini, tomato, onion, olive oil, vinegar, salt and pepper together and taste for seasoning. Serve with a  sprinkle of coconut bacon on top and devour. 

My Every Morning Protein Smoothie

I know how hard it is to get a proper breakfast. We're all running around, dazed by the alarm and lack of sun, early risers greeting the day with...what's that? A cup of coffee? A glazed donut? Those days are long gone for me, since I know how important it is to set yourself up for the day. But believe me, I lived there for many years.

According to my teacher Dr. Ritamarie Loscalzo's research, enjoying protein in the morning can help diminish any later-day cravings for sweets and carbs. I've seen this happen in my life, where in the past, I may have started out with starches or carbohydrates, then I get a quick sugar spike, then I need something again after two hours since my sugars are down...the dreaded rollercoaster! Ideally, your breakfast should have enough protein, greens, & healthy fats to keep you satisfied for hours. Creating something like this isn't that likely if you're rushing out the door and you just need a quick fix. 

This is why I created this smoothie. It takes under 3 minutes to make, is loaded with all the necessary nutrients I need to start my day right, is gluten free, vegan, loaded with bio-available protein, and tastes like a milkshake! Emphasis on the last part. 

I also love this new indian spice box which I bought to assemble all my necessary powders, my add ins: from the top right, going clockwise we have: spirulina, moringa, nigella seeds (I take a tsp and swallow with some smoothie, not blended in), maca, a supplement I take for PCOS, dehydrated low-glycemic berry powder (which I only put in when I'm out of raspberries) and in the middle we have Green Vibrance powder. Guess what? By the time 8:00 am hits, I have this mega smoothie packed with whatever add in's I want for the day (and they're not always the same, by the way).

You can also play with the recipe by adding in some other things, like aloe vera, maybe some E3Live, and even take my vitamin D supplement. I make it work for me, rather than the other way around. Keep it fun but most of all, keep it simple.

The toppings are great also. Why? To slow you down. The only glycemic food here are the raspberries (and by testing them, I know I tolerate them well). But since they're blended and quicker to digest this way, I still like to take my time and keep myself from gulping everything down. Having something to chew really helps you slow down and enjoy your smoothie, starts the digestive process in the mouth, and offers more fiber as well. Also, you can add in any toppings you like (chia is also a good one). 

Ingredients:

2 cups water

1 scoop Sunwarrior Chocolate Protein Powder

3/4 teaspoon each of your favorite add ins (today I included everything but the berry powder)

1/3 cup frozen raspberries

toppings: anything you like, like cacao nibs, unsweetened organic coconut and pumpkin seeds, chia, bee pollen, etc.

Premium Starter Kit ~ 14-day challenge!

Welcome to your oily journey! You're in for some fun and inspiration...now that you've received your kit, many people are unsure where to start, so I created this fun 14-day challenge to take you through all of the oils and learn, one step at a time! Check them out below and enjoy! 

Also, in case you forgot, here's another slide to remind you the difference between the white vitality label and the regular label. I know it's showcasing lemon oil, but it still stands true for ALL of the oils - white label is Vitality (may be taken internally), regular label is topical/aromatic. In a pinch, if you're confused, all you need to do is peel the label back and it will tell you the safest way to use it.

Oil #1 for Day #1! Peppermint is one of my top DAILY oils! I love diluting one drop with a carrier oil of your choice (sweet almond oil, jojoba, etc) and putting it on the back of my neck to help me cool down. I also love adding the vitality peppermint oil to peppermint brownies, diffusing it for a clean, fresh scent, and inhaling to support my breathing. It's very uplifting too! A nice oil to diffuser when you're working out at home to put a pep in your step! What are your favorite ways to use it?

Oil #2 for Day #2: Lavender! I love Lavender for so many uses. I love rubbing some on my feet at night for a better sleep. I also love making sleepy time roll ons for friends with lavender, cedar wood and orange. The vitality Lavender can also be used internally and I love making lavender lemonade or if you're into baking, think lavender shortbread cookies? It also is probably the most purchased YL essential oil (for those of you who took the quiz!). It's called "the swiss army knife" of oils since it can do so many things! I also love adding it to my skincare routine. But the simplest and most fun ways to use it is simply to diffuse.....it brings such calm and comfort!

Oil #3 for Day #3: Lemon essential oil! 
Diffusing lemon is the way to go if you're looking for a clean, fresh, uplifting aroma (smells divine!). I love keeping lemon vitality by the kitchen sink for adding to the water I drink throughout the day. Also, did you know you can replace lemon juice or zest with the lemon vitality oil? Think lemon bars! Or raw vegan lemon goji energy truffles! Add a couple of drops to your salad dressing too. Plus it's great for cleaning. I love adding a few drops to the washing machine. One of my favorite diffuser blends (you have to try it!) is lavender, lemon, and peppermint (2-3 drops each)...As a side note: lemon essential oil can also get rid of that tricky sticker glue! SO many uses. What's your favorite?

Oil #4 for Day #4! The fact that Young Living put frankincense in the kit speaks volumes - this is such an incredible essential oil! I don't even know where to start! First, I simply love using it to meditate or ground me during yoga with its relaxing aroma. I put it in all things DIY for the face and skin, and also love making my own roller ball bottles along with lavender and orange (this combo is super calming so I love putting it on the bottom of my feet before bed), or in a relaxing pillow spray (1 ounce bottle, add some drops and then fill up with distilled water). For spiritual purposes, it's my #1 - when I'm feeling in a funk, or need to carry my meditation through the day with me, I love inhaling it and it instantly brings me back to my practice. I could go on and on and on! Frankincense and I are inseparable! How do you use it?

Oil #5 for Day #5! Whenever I open up a bottle of Copaiba, someone in a class ultimately says they've never heard of it and my response is "it's a secret gem of an oil", since it truly it! It's almost as versatile and useful as lavender, but not as well known. It's distilled from a resin (tree is grown in Brazil) and is in the same family as Myrrh and Frankincense, so the qualities are quite similar. I love adding it to my beauty face serums, skin salves or massage oils, and I'm finding out, it's the secret oil in blends that end up being my favorite blends ~ like Stress Away and Breathe Again roll on! I also love adding a drop of Copaiba Vitality to a mug of warm almond milk and a few drops of stevia for a nourishing night-time drink. How do you love it?

Oil #6 for Day #6! Digize for the win, when you want to support your digestion! I carry this with me when I travel, and love rubbing it into my belly or on the bottoms of my feet. I also love using it with peppermint, for digestive support, and together they make a wonderful pair! I'm spoiled at home, where I get to eat food that I'm used to, but in visiting family, eating out, sometimes tummy troubles are inevitable. I love having Digize vitality at a moment's reach for any digestive support I may be seeking!

Oil #7 for Day #7 ~ Thieves! This for me was the gateway oil (while for the rest of the world it's probably lavender!) As some of you know, I'm also a music teacher and many years ago, I was looking for immune support since all of my kiddos were coming in with all sorts of bugs! A friend of mine had Thieves hand spray (which I highly recommend) and I started to spray my piano with some of it. And here we are, years later. I still use it every single day, but now I use the diluted concentrate in a spray bottle (and I carry the hand spray in my purse). LIFE CHANGER! All kinds of wonderful immune support plus it smells divine - I love diffusing it, adding it to my DIY, and even making "Coke" with the Thieves vitality oil using: seltzer, 2 drops Thieves vitality oil, 2 drops tangerine vitality, and some maple syrup or stevia (it's AWEsome good!)...but I have to mention the Thieves cleaner since Thieves is a WHOLE line of amazing products, like toothpaste, mouthwash, hand spray, cleaner and so much more! Toxins out, chemicals out, health and wellness in!

Oil #8 for Day #8 - I simply LOVE this oil! RC is a blend of three types of eucalyptus and is fresh and invigorating. I love applying a little with a carrier oil to the back of my neck before and after a workout, and love making my own salve with aloe vera gel and sweet almond and a few drops RC to rub on the chest for some respiratory support. It's also my go-to when creating inhalers with organic cotton round inserts, for any type of respiratory and breathing support. 

Oil #9 for Day #9 - Panaway is always ready to soothe! I love diluting it with a carrier oil to massage my muscles after a good workout, plus it smells incredible with the wintergreen and clove! An excellent oil to carry with you to the gym!

Oil #10 for Day #10. OK, I know I say this a lot but this is one of my FAVORITE oils! It's a gorgeous, refreshing blend that contains citronella, lemongrass, rosemary and myrtle, among others. It's one of my favorite oils to add to my outdoors spray so I can enjoy the summer outdoors when I'm hiking, and soothe my skin! Also, I love adding purification to dryer balls and which both scent the laundry in amazing ways and also cut out static. No chemicals in our laundry room! And the clothes come out smelling incredible! Also a great oil to put on a cotton round and place in an air vent when traveling - sometimes hotel rooms smell icky to me, and this refreshes the room in wonderful ways! 

Oil #11 for Day #11 ~ oh, Stress Away. This one never leaves my side. It's my #1 diffuser blend to chill out, especially in the middle of the day when stress can be quite high! With vanilla and lime, it's super comforting and is also one of my favorite ways to wear "perfume"! Add it to bath salts for an incredible experience as well. I've found myself in an interesting pattern lately... when I'm sitting in the car at any point - at a red light, at the bank, picking someone up, Stress Away always comes out of my bag and I rub it on the back of my neck and wrists. Waiting becomes a pleasurable experience! 

Day 12 - Ningxia for the win! I love drinking my Ningxia serving (1-2 ounces will do it!) around 3:00 pm when my energy slumps and I crave a little something....it's also in my bag after a hike, or on road trips for some super good nutrition! 

On day 13, we learn about Essential Rewards ~ It's your prestige rewards membership in a customizable wellness box! Think Amazon meets Costco meets your cash-back credit card! I love being on ER since it's CONTINUED learning - you can't use what you don't have, right? You can choose oils to learn, past the premium starter kit, but remember YL is a wellness company. You can add toothpaste, mouthwash, chemical-free make up, soap, shampoo, lotion, doggie treats, goji bars, Ningxia, anything you can think of that promotes the healthy lifestyle that we're all reaching for! But instead of going to a store (and not being sure what you're getting), you buy from the best AND you get some serious perks while doing so: Free bundles at different payment tiers, chosen monthly, Discounted shipping, You earn points back on all of your YL purchases (10% back for the first 3 months, 20% back for months 4-24, 25% back for 25+ months), Free gifts at months 3, 6, 9, an Exclusive “Loyalty” oil at month 12 (not for purchase otherwise). All this from buying things we already need. Your local pharmacy doesn't give you all of these perks! So it's not about purchasing more, it's about making your normal purchases with Young Living instead! One last thing - those percentages back are no joke! I made a purchase last month for $150 that was completely free, paid for the credit I accrued over the past few months. How awesome is that? 

Thank you so much for joining us on this journey! This is day 14, and by now, you are much more educated on all of the wondrous oils you are holding in your hands! But this is just the beginning. Feel free to reach out to me with any questions...I'm always here to support you! 

The "Happy Life Challenge"

Happy New Year, Everyone!  

I'd like to welcome you to a New Year Challenge. But first, I'd like to start with a short story of a happy little accident....I created this little photo (see above) and meant to say "Happy New Year...Detox Your Life Challenge", because well, this whole challenge is about detoxing your life. But it reads "Happy Life Challenge" in bigger bolder wording. I was frustrated at first, seeing how things didn't line up the way I wanted them to, and then I thought..."wow, that's actually perfect". So I'm leaving it right there. 

So this New Year ~ Detox Your Life Challenge....It really is about having a happy life. It's not your typical challenge in many ways, and you'll read why in just a second...but it's based on what I've personally gone through this past year that has helped me in tremendous ways, and has left me a happier person. I hope that in sharing what I've learned can support you in your journey also.

Nope, this is not your typical challenge or detox. First, most challenges are boxed in, and you have to fit the mould. They're timed and goal specific. Most challenges begin with a start date. And an end date. And they're monumental in some way like "juice for 30 days" or "no meat, no sugar, no flour, no gluten, no grains, no juice, no soda, no angry people in your life, no make-up for the week, no swearing"...well, you get the drift. I'm not making fun of them ~ in fact, I have an October Salad Challenge and about two years ago, I did 30 days of green juice and it was amazing. Adding a salad to your meals once a day isn't anything monumental, I don't think...but in general, most challenges are very rigid and are encapsulated in a time box...what do you do when it's over? Actually, nobody talks about the "post-challenge" part, which in my opinion, is the most important part. What if you falter mid-way? I wanted something different.  I wanted to create a detox challenge that is digestible, in little bites, which would lead us to joy. Like, as in "Little Bites of Joy". This is what it's all about.  I'm proposing here is the following....

1. No date structure.....this is only set up as a January challenge because there will be a prize give away at the end (details below). But in reality, there is no actual end date to the challenge ~ or even start date for that matter (in fact, you can begin doing this today if you wanted to....read more below). Why? Most people give up on their resolutions by February, and then the whole year is shot. Doesn't that just sound crazy? But is health really just a 21-day bandaid, or is it a lifestyle? So many people say they want to "get back on track" (I've said it too)... but what does that really mean? Instead of fixing, failing, fixing, failing, how about we just move in the direction of "better than" vs. "less than" (this is my husband's quote, not mine, and sadly can't take credit for it - but it's a wise one). So, no, this isn't for a month. This challenge is supposed to linger and last as long as you need it. What I'm proposing is a shift in perspective, created by micro-adjustments on a daily basis, and you can take as much time as you need. But yes, technically, this challenge does have a prize, and the winners are announced at the end of the month. That's the only time element in here. 

2. It's about the big picture: this detox is not one-thing specific. It's a comprehensive approach. It's not just about food (did you think it was?). It's about decluttering. Because as I always say, I can't talk to you about cutting back on sugar when you feel there's no sweetness in life. This is about looking at your emotions and the psychology of eating. And your plate size. And your sleep, relationships, creativity, job, household products, chemicals, deodorant, life purpose, toxic relationships. And about mindfulness. Did I miss anything? Actually, yes, a lot. I'll address many things that I believe can assist us in living healthier lives, with one thing in common: simplicity. 

It's about simplifying your life.

I'd like to return to a simpler way of eating, breathing, living, sleeping, cleaning, and relating to people.  So how can you simplify your life so that you only focus on what matters, and you life the healthiest life (mentally, physically, emotionally, spiritually) that you possibly can? I'll try to pick this question apart in the coming month and share with you a buffet of tips and tricks that have helped me simplify my life, and as a result, have helped make me a happier person. 

3. Rules: there really are none. Isn't that great? No homework. ...you pick which tips resonate with you and which don't. It's that easy. But what I do ask is that you try to give all or most of these tips a shot. Mull the question over. Do the inner work. These are all life-changing. Also, in order to interact and have community, and to see that you're an actual participant in the challenge (and not a robot)...

Here's what ya gotta do....

  • Check in to the Little Bites Instagram feed (meaning follow) and FB page (meaning like it) and stay tuned on a daily basis. This is where I'll check in daily with you. Offer some tips, questions, tidbits to get you thinking in a different way. 
  • If you decide to follow through on a tip, answer a question, post your response, or anything else, just tag #LittleBitesOfJoy or (@LittleBitesOfJoy on Instagram) so I can see it. 
  • At the end of the month, the two people with the most introspective answers, pictures, answers to questions, what have you...will win a special prize. Which will be revealed at a later time. Since it's not about the prize, right? It's about doing inner work. (But make sure you tag since if you don't, I won't be able to find you). 

Phieu. 

That's it. 

So when do we start? How about right now?

You might say, you could use a week to prep for this challenge, but that's relying on the idea that you need something outside of yourself to get yourself ready. Or you need more time. In actuality, you don't need anything more than what you already have. You come fully equipped to start right now. Just show up as you are. Check in to Instagram or FB and follow along. I'll start the write ups January 3rd. 

Herbed Raw Boursin


This probiotic-rich fermented cheese tastes very much like Boursin cheese, although it's completely dairy free and actually good for you! It goes really well with flax crackers and crudites, and although it is a 3-step process, it's actually very easy to make. 

2 cups soaked cashews (at least 4 hours), drained

1/3 cup hemp seeds

1 cup warm water with 1-2 teaspoons probiotic powder

Chopped dill, chives, peppercorns


Step 1: In a vitamix or high-speed blender (with tamper preferably), blend soaked cashews, hemp seeds, and the water with probiotic powder until smooth*.  Remove the mixture into a nut milk bag and let ripen over a colander in a bowl, covered and with a small weight, for about 15-24 hours, or per your taste.  To speed the process, you can also place it for 1 or 2 hours on top of a dehydrator to absorb some of the heat. 

Step 2: Scoop out the mixture into a bowl, and add 1-2 tablespoons chopped dill and 3 good sized chives, minced small.   Season with a little salt and taste, and adjust the seasoning if you need to.  

Step 3: Line a mold of your choice (ramekin, a 4 inch mold with a pop-out bottom, etc.) with wax paper or plastic wrap and pour the cheese mixture in.  This recipe should be enough for 3 or 4 ramekins or two 4-inch molds. Cover with more wax paper or plastic wrap and refrigerate at least overnight to set well.  

Step 4: Flip over, remove the wrapping and decorate with crushed herbs/pink peppercorns. Keep refrigerated and enjoy!  

I love this cheese best sprinkled with herbes de provence, at the very end. It takes it to a whole new level! 

NOTE: I tend to like my cheese tart and a little more ripe, so I add about 1.5 teaspoons. Also, the longer you let it sit (or if you put it on the top of your dehydrator to absorb some of the heat that comes out) it will ripen faster.

Leek & Mushroom Crustless Quiche with Coconut Bacon & Chili

I can't remember the last time I ate eggs - probably 6 years ago? I don't miss them honestly, but sometimes I do feel like a scramble or a quiche of some sort. I try to stay away from soy if I can, so when this new product hit the shelves (Follow Your Heart VeganEgg), I decided to try it out! Well, the first time I made the quiche, all three of us (including our 16 year old, who has discerning teenage taste buds) fought over it. It was gone in 15 minutes. 

Vegan Egg comes in a powder (see picture below), so you have to add liquid to it to resemble a scrambled egg. It's mainly made from Algal protein and flour (a type of seaweed), and some black salt and nutritional yeast (which gives it en eggy flavor, a sulfur-rich taste). It does contain carageenan, so if you have some tummy troubles, scroll down to the bottom of recipe to read what I have to say about it.

Otherwise, this quiche is gorgeous, light, fluffy, and resembles eggs exceedingly well. The flavors are slightly sweet from the caramelized leek, with a salty and umami taste from the mushrooms. And, the coconut bacon takes it over the top. I like the light kick the chili flakes add, and also, and wouldn't be mad if you served it with some kind of hot sauce (I won't tell). 

Coconut Bacon, Recipe Found here. 

Coconut Bacon, Recipe Found here. 

I used this recipe as a template, although I tweaked it so it's crustless (low-glycemic and gluten free) and loaded with veggies (fiber and flavor!). I include it here in case you want to see the original. 

1 tsp coconut oil

2 cleaned leeks, white part, quartered and sliced into small ringlets

1/2 red onion, medium chop

two pinches sea salt

2 cups baby portabella mushrooms, chopped

3 vegan eggs (6 level tablespoons of Vegan Egg plus 1.5 cups ice cold water)

1/2 tsp sea salt

1/4 cup coconut creamer

1/2 cup almond milk

1/4 cup coconut bacon (recipe found here)

chili flakes for garnish

Melt coconut oil in a skillet over medium heat. Add in the leeks, onion and two pinches of salt and cover until they sweat and begin to caramelize. Watch them closely as they may burn. Once caramelized, add in the mushrooms, cover, and sweat until they soften. Set aside. 

In a bowl, combine the vegan egg, 1/2 tsp salt, coconut creamer, almond milk and wish until smooth. Add in the mushroom and leek mixture and stir to combine well. Pour into a pie dish and bake at 325 degrees for 55 minutes. Let cool 5 minutes, sprinkle with chili flakes, coconut bacon, and serve warm. Enjoy!

A note about Carageenan: it gets a bad rap, but I keep reading conflicting articles on it ~ it hurts some people's tummies and causes inflammation, and for others it doesn't (and in fact helps fight viruses?). When in doubt, and if you're sensitive to digestive upset, I wouldn't use this product ~ period. Why risk it? For us, it hasn't caused us any digestive discomfort, so it's OK with us to use this product once in a great while as an occasional treat...and I mean treat. Once a month? If you're concerned, definitely do your own research and go the cautious route. That said, I found this to be a good article. Also, it's hard to find, but I buy it on Thrive Market (Amazon also carries it and maybe some health food stores). 


Taco Salad With Chipotle Salsa Fresca

It's amazing what you can do with a little seasoning and some really delicious whole ingredients. Really amazing. I have this HUGE love for any latin-influenced food ~ it really comes down to tomatoes, cilantro, garlic, onions and a good dose of spice, and this salad has it all! 

Taco Meat:

1 cup raw pumpkin seeds {soaked in water 4 hours, rinsed and drained}

1 cup raw sunflower seeds {soaked in water 4 hours, rinsed and drained}

1 heaping tablespoon taco seasoning

Salt to taste

Combine the seeds and seasoning in a food processor, and scrape the sides a few times while processing. You may add some onion powder or coconut aminos if you wish, but I find that this didn't need much of anything. I say "salt to taste" since some taco seasonings already come salted, some not salted - add enough so that the delicate flavors come out, but start with just a little. I think I added about 1/2 tsp total. Store the taco meat separately in its own air-tight container and it should last a good 4-5 days or so in the refrigerator. 

Chipotle Salsa Fresca:

2 cups seeded and diced heirloom tomatoes {best to strain out the juice too}

1.5 green onions, sliced

1 clove garlic, microplaned

a few pinches of chipotle powder {or more if you can tolerate it!}

few pinches of good salt

a pinch of cumin

1/3 cup chopped mango {optional but delicious}

small handful of cilantro, chopped

Combine all ingredients {except for cilantro} in a food processor and pulse briefly to incorporate. Add in the cilantro and pulse again to incorporate, but not too much {overprocessing herbs makes them bitter} 


TO ASSEMBLE SALAD:

Layer Romaine and other leafy greens with the salsa, avocado and a generous scoop of the taco meat. Enjoy!


Ground Cherry & Ginger Coconut Ice Cream

Farmers rule! And farmers markets rule even more because they bring everyone together. The best find last week at the Red Bank farmers market was this glorious mound of ground cherries. I had to make a wish, since I'd never ever had one and the taste was out of this world, indescribable, pretty delectable. 

IMG_6626.JPG

Quite easily, I could peck at them all day as I walk back and forth, and just eat them straight out of their wonderful papery wrappers, but I kept tasting a hint of ginger....or I should say, the two flavors would marry very well. Ground cherries, at least as I taste them, are a mixture of kiwi and some kind of citrus, delicate, sweet, and pretty addictive. I figured, let's do something with these sweet little magical fruits. 

All you really need is 4 ingredients. Why? Let's be real here. I'm a 4 ingredient kind of girl. Yes, I might make pretty complex gourmet raw and vegan foods, but when it comes to feeding myself, it needs to be simple, fast and delicious (and with ingredients I can remember). 

One note about this ice cream: make it when you need it. Meaning, it's not one of those "oh, I forgot it in the freezer" types of ice cream. It's almost like banana ice cream, which I've found best when ready made so as to avoid the chunks of ice cream you get when you let it defrost a bit. It just doesn't "scoop" as nice after it's been frozen. If you don't mind it more like soft serve, definitely freeze it and defrost as you need it, but it solidifies in the freezer pretty well and doesn't replicate what you can do with store-bought ice cream that you can just spoon in your bowl. Most likely due to the fact that there are no stabilizers, thickening agents, etc. in this one. 

That said, it would make a killer popsicle. 

Ingredients: 

1 can coconut milk, refrigerated overnight

1 inch piece ginger, grated (if you like it extra ginger, go for a 2-inch knob)

1.5 cups ground cherries, measured after you've peeled them

dropper full of liquid stevia

Make sure everything is cold when you start, and that your ice cream container has been in the freezer for at least overnight. Combine all ingredients in a blender until smooth and taste for sweetness. Remember, if it's a little sweet now, it will lessen in sweetness as it's frozen. 

Pop in the ice cream maker and process according to manufacturer's instructions. For mine, I kept it in for about 25 minutes and it was smooth and creamy. Enjoy!

A Week at Living Light Culinary Institute

Last November, I hesitantly entered the Living Light "Hot Raw Chef" video competition. I say hesitantly, since if you know me, I tend to be a bit shy and prefer to stay out of the limelight (whenever I can). So, me on a video? Let's just say that I waited until the due date to actually film and submit. 

It so happened that I won the competition, which was a complete surprise to me; I was grateful that perhaps the heavens had a plan for me, one I didn't know of yet. 

Fast forward to August 14th, when I board the plane headed for San Francisco, CA...and then two shuttle busses later, I arrive at the Living Light Inn. I was exhausted but excited.....could I be both?  Yes. I entered this gorgeous Inn, surrounded by foliage I've never seen before, flowers I've never seen before, scents! I should probably say that wherever you walk in Fort Bragg, it smells like flowers. Not sure which kind...a hint of rosemary that everyone uses for hedges, succulents, vibrant pink flowers, and flowering evergreens. The Inn is historic, filters all of their water (including the showers!), and has organic bedding and towels ready for each and every one who comes in. There are books to peruse on healthy eating, a fully-stocked kitchen complete with a vitamix, blendtec, juicers, and every gadget you'd need to make this raw vegan kitchen perfect for all of our needs.

And then the classes begin. FUNdamentals is our first class, where we witness over 15 demos of delicious recipes, including sprouting, juicing, nut cheeses, crackers, brownies, pate, everything under the sun. Lunch was vibrant and filling, and then more demos. Day two (one of my favorites) consisted of meditations with carrots, tomatoes, cucumbers...KNIFE SKILLS. Dice, baton, mince, bias cuts, you name it. And, along the way, we added what we cut to our salads and had another feast.

Lunch is served...

Lunch is served...

Cucumber flower. 

Cucumber flower. 

Radish "mushrooms". Think Smurfs!

Radish "mushrooms". Think Smurfs!

Tomato Flowers. 

Tomato Flowers. 

The remainder of the week, I took Essentials which topped it all. Most days, I'd go into the commercial raw food kitchen and help wash, flip elements in the dehydrator, check on the kraut, help make smoothies, you name it. I was on cloud 9 simply being told where I should go, what I should do...being a part of the magic behind the scenes. And I felt a great sense of team loyalty and camaraderie. Everyone had a part, and we all helped each other. I also enjoyed seeing how organized everything was, labeled, in compartments, and nothing went to waste - scraps were either juiced or put into another batch of crackers. 

The chefs were over-the-top professional and inspiring. The students I was lucky to work with came form all over the world: Singapore, Australia, Germany, Hawaii, Canada, Massachusetts, some from California. At night, we'd walk home to the Inn together, make fun recipes, stay up way too late, sing and play the piano (I even got to play a Bossa Nova with everyone), and watch creations come alive (of course, we all shared). Oh, and yes, there was homework, and we got to do that too. 

The whole experience was life-changing, from the instructors & students I met, to watching the sun set in the ocean, hugging sequoia trees, coming upon waterfalls, seeing new plants I've never seen before, creating crazy recipes with friends and even making a video on my last night with a  dear friend at 11:00 pm. 

You'll be seeing many more recipes and classes which stem from the knowledge I've gained from Living Light, but even more so, a renewed inspiration to share with people the benefits of plant-based foods. Thank you, Living Light for an unforgettable experience. Thank you, heavens, for making it possible. 

The Most Chocolate-y Un-Chocolate Bar

If you read my last chicory coffee post, you saw that I’m taking a break from chocolate. Why would anyone in their right mind to that, you ask? Just as an experiment. I figure, I crave it, I eat the highest quality chocolate, but are there ways around it? Primarily, I’m trying to stay away from caffeine and the very little that I get in these beautiful little nibbles of chocolate here and there sometimes make my ticker, well, tick faster.

I mainly miss the aroma of chocolate. The taste is great, but really, it’s the scent of it. If I could have a chocolate candle burning in the house {without getting a headache from it}, I’d be in heaven. But for now, I must resort to stealth & experimental ninja moves in the kitchen to procure that which I desire most: the most chocolate-y un-chocolate bar.

What, what?  Yes, yes.

The best part? NO sugar. That’s right. It only uses stevia and two little raspberries that are completely optional by the way. It’s like a raw, paleo, low-glycemic, gluten free, cruelty-free, magical, good for you unchocolate bar. The other best part? It uses carob, which is a dreamy substitute that, when used the right way, can fool any palate. 

Carob powder

Carob powder

It’s summer, so lately I’m in the house less and outside of it more, tending to the voracious garden and getting some activities in. Because of this, most of my recipes are quick and no fuss.

I gathered some ingredients together and the first time, it was a FLOP. The chocolate was amazingly good, but 80 degrees in the house made it fall apart on contact. The second time, instead of using coconut oil, I used cacao butter and that fixed everything. Live and learn, and eat as you go, but this is as chocolatel-y an un-chocolate bar can get! 

Cacao butter wafers. 

Cacao butter wafers. 

So what are these secret incredients: 

Carob: it’s the winner when you want to have something chocolate-y.

Salt: in all desserts to bring out the flavors – a pinch of salt.

Cacao butter: keeps it stable, although I still recommend keeping it in the fridge.

Cacao nibs (if you have no issues with caffeine, put them in there as they add a crunch, otherwise don’t include)

Almond butter: keeps it raw and adds some protein.

Raspberries: take it over the top.

Method: 

4 tablespoons carob powder

pinch sea salt

1 tablespoon cacao nibs {optional}

4 tablespoons melted cacao butter {in dehydrator for truly raw, or stovetop in a double boiler}

2 tablespoons raw almond butter

1 dropper full hazelnut or original stevia

2 freeze dried raspberries, optional {I found mine at Trader Joe's}

Combine all ingredients except for raspberries together and smooth. Taste the "batter" and make sure it doesn't need more salt or stevia, per your palate. In a silicone mould {I used a chocolate bar mold but also little ones for surplus}, pinch the raspberries into a powder and sprinkle into the moulds. Pour the chocolate mixture in. Place in fridge for at least 3 hours. Un-mould and enjoy! This makes enough for one chocolate bar and about 5 little mini moulds for the surplus batter, roughly 1 tablespoon each.


Berry Dream Soft Serve Ice Cream

We've started summer a bit early. We've had a long winter, paid our dues through shoveling and although I love the snow and its magical solitude, I really long for dipping my toes in the surf, opening up all the windows in the house and wondering which t-shirt I should wear that day. Those days will come soon, but for now, we're enjoying a little splurge in the sweet tooth department...we all have it, and I personally am confessing to it. With the recent emphasis on low-glycemic foods, however, sweet and healthy don't always get along (until now).

Enter the berry dream soft serve ice cream....

My favorite is to allow a little crunch to it...add in some crushed walnuts or cacao nibs, coconut, what have you...but it's like soft serve with some naughty add ins, except without the belly ache after, no bloating, and all the satisfaction of hunkering down to a nice bowl of chilled goodness.

The BEST part is that it's made literally in under 5 minutes with staples we all have on hand: a can of coconut milk, some frozen berries, and your trusty bottle of stevia. So...your in-laws come over and you want to wow them? This will do the trick (without breaking a sweat).

1 can (chilled) organic coconut milk

1 bag frozen strawberries

1-2 dropper fulls of liquid stevia (non alcohol is best)

In a vitamix or strong blender, combine all ingredients together and blend with the tamper until smooth. Dish out, spoon in hand, and enjoy wholeheartedly. 


Arugula Salad with Tarragon & Mushrooms

Are you itching for spring like I am? We've been covered in snow since December and I'm eager to get my fingers dirty in the beautiful soil underneath, grow some great grub, make some delicious recipes happen. In honor of this vision, I wanted to celebrate with fresh herbs, pungent arugula and savory meaty morsels of mushrooms, tossed simply in a light vinagrette. Enjoy spring, enjoy what is to come, and seek out new flavors and combos...

2 cups mixture of: baby portabellas, shitake, oyster, maitake, or other mushrooms, sliced

2 cloves garlic

2 large handful baby arugula leaves

Meat from 1 avocado, chopped medium

1/2 cup loose tarragon

olive oil and raw apple cider vinegar

sea salt

Heat up a skillet over medium and drizzle a little olive oil (or coconut oil). Add in garlic and a few pinches of sea salt and watch so it doesn't burn, but sizzles just a little. Add in the mushrooms and sautee until they soften a bit. The sea salt should help them release some juices. Taste for seasoning (I like to add fresh crushed black pepper and a few pinches of hot pepper flakes).  Set aside. 

In a large bowl, combine arugula, a small splash of olive oil (you don't need much) and two splashes of raw apple cider vinegar. Add in a few pinches sea salt. Toss to combine. On two plates, serve the arugula, topped with avocado and mushrooms. Lastly, chiffonade the tarragon and add to each plate. This dish serves two. 

Raw Apple Cinnamon Crisps

This recipe came by mistake, actually. I was intending to make apple leather and, well, I sort of forgot about it as it was "cooking" in the dehydrator. When it came time to peel it off the dehydrator sheet, it came out in one large, very firm cracker which I then tasted and fell in love with. And ironically, I left it out (of the dehydrator) for a few hours and it became soft like fruit leather. So yes, you can have it both ways.

This recipe is best with tart green apples, but if tart isn't your thing, feel free to experiment with red apples, pears, or a combo of both. 

2 green apples, chopped, with peel

juice of one lemon

1 tsp cinnamon

Blend the three ingredients together and pour onto a dehydrator sheet fitted with a teflex sheet. Dehydrate overnight at 110 degrees. Break into little crisps and enjoy! Best if kept in an airtight container, although in a few days it will begin to soften naturally. If so, just pop them back in the dehydrator for a nice crispy treat! 

Epson Salt Bath For Detoxing

I wanted to welcome Leila Firmin as one of our guest writers on the blog. She and I met at the Alissa Cohen Raw Foods Level 3 Certification in Maine, and we've been close ever since. Here, she shares with us one of her "go to" recipes for Epson Baths to accompany any detox regiment: 


  • 2 cups of Epsom salt

  • 3 tbs of baking soda

  • 1 cup of apple cider vinegar (optional)


Directions; 3 times a week- fill bath tub with very warm water as much as you can stand, add all ingredients and mix. Then soak for 15-20 min. You want to sweat while in there. Have a glass of water or juice near incase any weakness. Take advantage of the time in the tub and use it for deep breathing exercise or meditation. Once finished take warm shower with a natural or sea salt soap. This is best before bed. Makes you happily sleepy.

Also great way to knock 3 detox techniques at once is by doing the facial oil pulling while the bath water is running.  Then rinse with warm towel in the shower. Always use the most natural products and safest water possible.

Benefits- Flushes toxins and heavy metals from the body. Eases muscle, aches, pain, soreness in the joints. Relieves stress, headaches, and softens the skin. Detoxifies the body from medicines and environmental exposure. Also alkalinizing to the body. This is just to name a few!


By Leila Firmin

www.juiceincolors.com